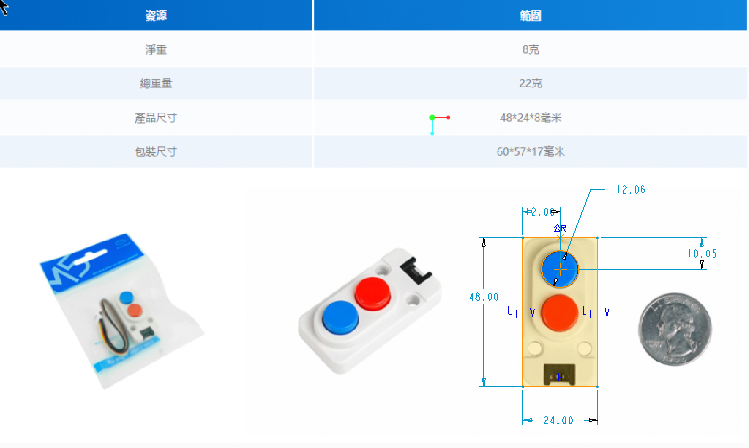
Use cad plane to measure dimensions is 12 mm
F
Offline
Best posts made by flypeek
-
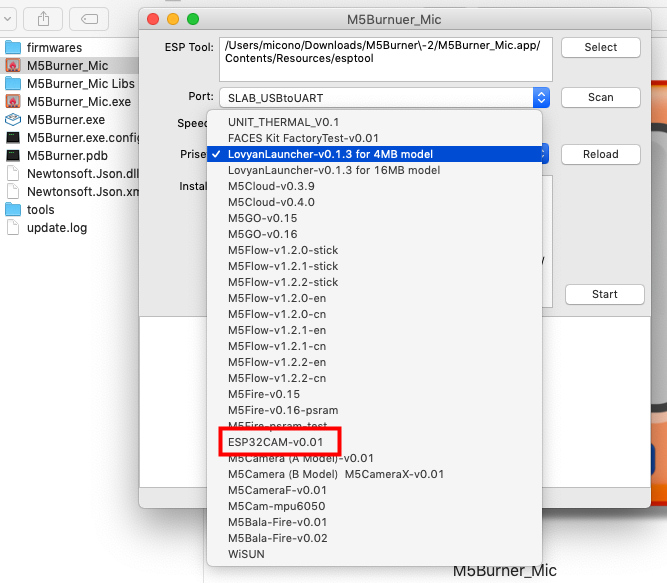
RE: Initialization?
you can try M5Burner_Mic
https://github.com/micutil/M5Burner_Mic
-
RE: UIFLOW does not save python code
Import large MicroPython scripts with UIFlow
https://qiita.com/ciniml/items/68bc7f362d6985efc640 -
RE: Cardputer... HID device?
usb keyboard demo
https://github.com/m5stack/M5Cardputer/tree/master/examples/Basic/keyboardMasterkey - USB WiFi Keylogger
https://github.com/justcallmekoko/USBKeylogger -
RE: Error compiling examples
you can see examples
#include <M5AtomS3.h> not #include "M5Stack.h"
Latest posts made by flypeek
-
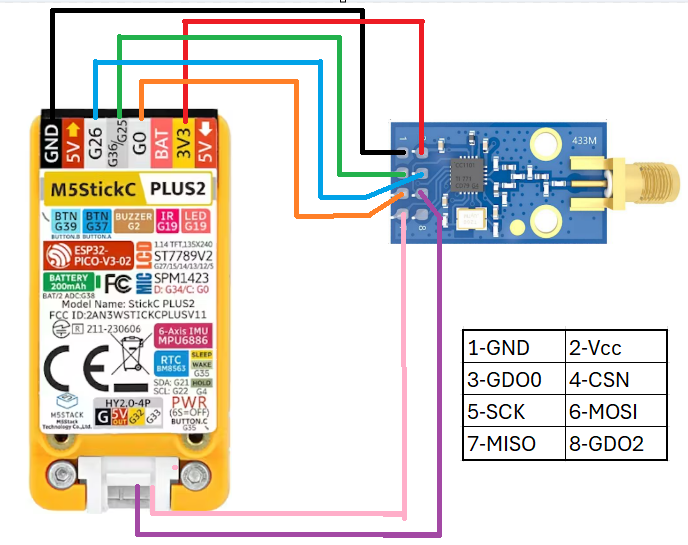
RE: Need someone to teach arduino have a stickcplus2
https://docs.m5stack.com/en/arduino/arduino_ide
https://docs.m5stack.com/en/arduino/m5stickc_plus2/program
* @Hardwares: M5StickCPlus2 * @Platform Version: Arduino M5Stack Board Manager v2.0.9 * @Dependent Library: * M5GFX: https://github.com/m5stack/M5GFX * M5Unified: https://github.com/m5stack/M5Unified * M5StickCPlus2: https://github.com/m5stack/M5StickCPlus2 */ #include "M5StickCPlus2.h" *focus -
RE: M5 Unit Scroll Arduino Example
Connect the 4 wires on the back of g21 and g25, and modify the program code pin code

-
RE: M5Unit_CO2_Core2 example compilation error
@GordonD said in M5Unit_CO2_Core2 example compilation error:
fatal error: bsec2.h: No such file or directory