Process of controlling the suction pump on myCobot280 in Python
-
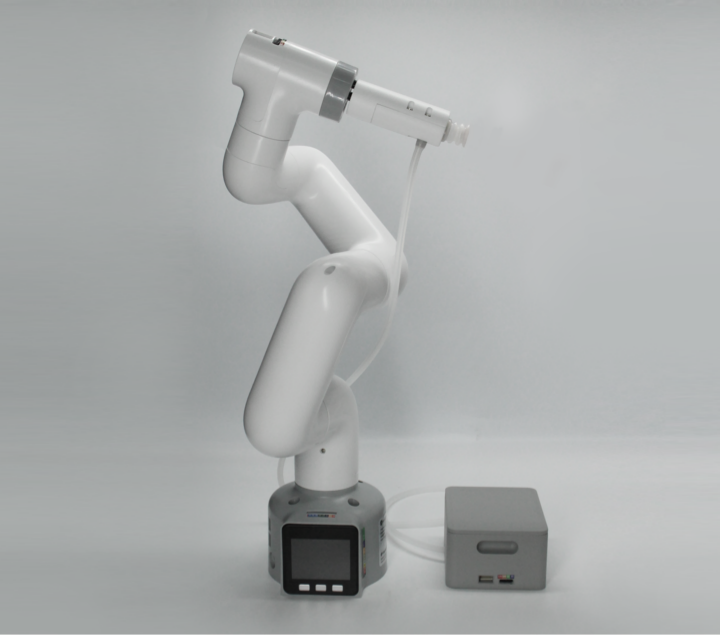
The suction pump is also a useful auxiliary tool for myCobot 280 series product. So how do we install the suction pump on myCobot 280-M5 and myCobot 280-Pi and control it in Python environment? Here is the detailed process we made for you!
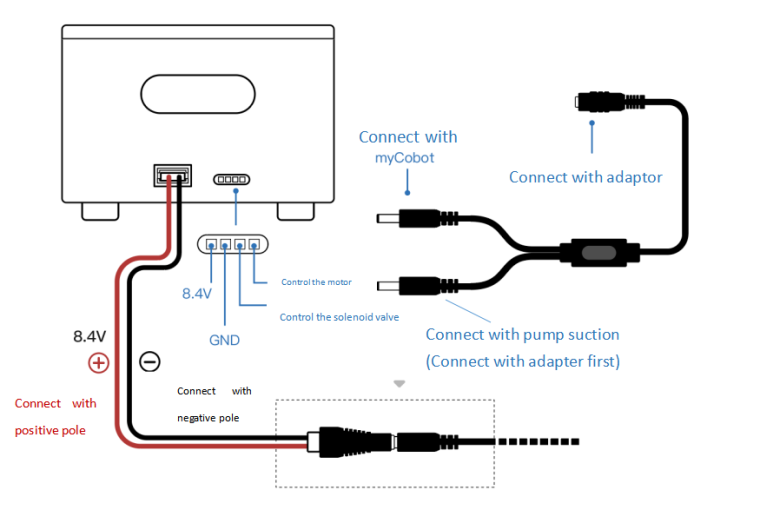
Schematic diagram
1)Female headline -- the power line end is connected to the port on the left side of the suction pump, the other end is connected to the outlet end of one and two lines, and the outlet end is connected to the power port of the mechanical arm, and the inlet end is connected to the power adapter.
2)The pin end of Dupont line is connected (wiring diagram) to the annotating interface of the control motor and solenoid valve, and the other end is connected to the mechanical arm G2 and G5 pins (M5) 20 and 21 pins (Pi).
3)The suction pump head was fixed on the end of the manipulator using LEGO technology.
Installing the suction pump for myCobot280-M5
1)Connect the suction pump pin to the Basic pin
2)The solenoid valve control pin is connected to the Basic-G2 pin
3)Pump control pins are connected to basic-G5 pinInstalling the suction pump for myCobot280-Pi
1)Connect the suction pump pin to the Basic pin
2)The solenoid valve control pin is connected to the Basic-20 pin
3)Pump control pins are connected to basic-21 pinVideo Demo:
How to install the suction pump?After installing the suction pump, let's run the code. Here are the cases of the code we provide to you:
For myCobot 280-M5 version:from pymycobot.mycobot import MyCobot from pymycobot import PI_PORT, PI_BAUD # When using the Raspberry Pi version of mycobot, you can refer to these two variables to initialize MyCobot import time # Enter the above code to import the packages required by the project # MyCobot class initialization requires two parameters: # The first is the serial port string, such as: # linux: "/dev/ttyUSB0" # or "/dev/ttyAMA0" # windows: "COM3" # The second is the baud rate:: # M5 version is: 115200 # # Example: # mycobot-M5: # linux: # mc = MyCobot("/dev/ttyUSB0", 115200) # or mc = MyCobot("/dev/ttyAMA0", 115200) # windows: # mc = MyCobot("COM3", 115200) # mycobot-raspi: # mc = MyCobot(PI_PORT, PI_BAUD) # # Initialize a MyCobot object # Create object code here for windows version mc = MyCobot("COM3", 115200) #Let the basic2 position enter the working state mc.set_basic_output(2, 0) #wait for 2 seconds time.sleep(2) #Let the basic2 position stop working mc.set_basic_output(2, 1) #let atom 5 work mc.set_pin_mode(5, 0) #wait for 2 seconds time.sleep(2) #let atom 5 stop working mc.set_pin_mode(5, 1)For myCobot 280-Pi version:
from pymycobot.mycobot import MyCobot
from pymycobot import PI_PORT, PI_BAUD  #When using the Raspberry Pi version of mycobot, you can refer to these two variables for MyCobot initialization
import time
#Enter the above code to import the packages required by the project

# MyCobot class initialization requires two parameters:
#   The first is the serial port string, such as:
#       linux:  "/dev/ttyUSB0"
#          or "/dev/ttyAMA0"
#       windows: "COM3"
#   The second is the baud rate::
#       M5 version is:  115200
#
#    Example:
#       mycobot-M5:
#           linux:
#              mc = MyCobot("/dev/ttyUSB0", 115200)
#          or mc = MyCobot("/dev/ttyAMA0", 115200)
#           windows:
#              mc = MyCobot("COM3", 115200)
#       mycobot-raspi:
#           mc = MyCobot(PI_PORT, PI_BAUD)
#
# Initialize a MyCobot object
# Create object code here for Raspberry Pi version
mc = MyCobot(PI_PORT, PI_BAUD)

# initialization
GPIO.setmode(GPIO.BCM)
GPIO.setup(20, GPIO.OUT)
GPIO.setup(21, GPIO.OUT)
# open suction pump
GPIO.output(20,0)
GPIO.output(21,0)
# wait 2 seconds
time.sleep(2)
# Turn off the suction pump
GPIO.output(20,1)
GPIO.output(21,1)
In the process of code running, myCobot will start working and we can monitor the state of motion of the suction pump. The maximum bearing weight of the suction pump is 200g.
We hope this helps. In the meantime, we want to ask whether you have some ideas about what other auxiliary tools can be used on myCobot? Please share with us in the comments.
-
When using "myCobot 280 Pi - 2023", the voltage adapter is 12V, not 8.4V. Also, I purchased on Amazon and the power connections where screwed in reverse.
Is there anywhere I can find better specifications on this pump?