Navigation

    M5Stack Community

    • Register
    • Login
    • Search
    • Categories
    • Recent
    • Tags
    • Popular
    • Users
    • Groups
    • Search
    1. Home
    2. r_255
    3. Posts
    R
    • Continue chat with r_255
    • Start new chat with r_255
    • Flag Profile
    • Profile
    • Following
    • Followers
    • Blocks
    • Topics
    • Posts
    • Best
    • Groups

    Posts made by r_255

    • RE: M5ez, a complete interface builder system for the M5Stack as an Arduino library. Extremely easy to use.

      I think ( but i am a noob) that the location of your libraries are not right.

      Got multiple versions of the arduino ide installed ?

      C:\arduino-1.8.7\libraries\WiFi
      C:\arduino-1.8.7\hardware\espressif\esp32\libraries\WiFi
      C:\arduino-1.8.7\portable\sketchbook\libraries\M5ez\

      My best guess is to clean up other versions..... or update all versions on your system to m5ez 2.01

      posted in PROJECTS
      R
      r_255
    • RE: M5ez 2.0: testers wanted...

      Having fun with m5ez

      0_1540462728485_IMG_0144.jpg

      Now i am a copy and paste my own code .... coder....
      Copied my slider and made a mechanism that selects and sets each slider.
      Next and previous makes you jump between each slider, left and right sets the value , ok publishes the value and up gets you back to the main menu.

      I still have issues to get my values in to m5ez object like the header, text works fine but int is still a issue. Tried to convert them to chars, but failed....
      So much to learn at once.

      posted in M5EZ
      R
      r_255
    • RE: [WIP] M5ez Hello World.

      Okay, i am going to try, as i want a value above my slider :O)
      Thanks !

      posted in Lessons and Guides
      R
      r_255
    • RE: [WIP] M5ez Hello World.

      I did try it, but failed hard...
      thanks !

      posted in Lessons and Guides
      R
      r_255
    • RE: [WIP] M5ez Hello World.

      Is the hello world text replaceable with a variable ?

      posted in Lessons and Guides
      R
      r_255
    • RE: M5ez 2.0: testers wanted...

      You could also add just an image to your mez screen.like this. But it has to be on a sd card.

      M5.Lcd.drawJpgFile(SD, "/c50x50_light_icon_off.jpg",20, 75, 50, 50);

      Below is my experiment to make my own dynamic slider to get familiar with the arduino ide and m5ez
      The end goal is to read the value from mqtt and set the slider to the known value of the dimmer and set it

      int bar_position = 25 ; // START POSTITION ( TO DO : READ THIS VALUE FROM MQTT AND SET IT )
      

      Drop the line above in top of the m5ez to set the start position of the bar. Paste the below code in de the m5ez demo add to the main menu.

      void menu_brightness_slider(){
      
        int Bar_step_amount = 10;  // bar is devided in XX steps ( for on/of set to 1 )
        int Bar_lenght = 275; // Length of the slider bar
        int Bar_height = 28;  // Height of the slider bar
        int Bar_steps = Bar_lenght / Bar_step_amount;
                
                    
        int Top_hLine_Start_X = 22; // X postion on screen from the left side
        int Top_hLine_Start_Y = 150; // Y-postition on screen from the top
        int Top_hLine_End_X = Bar_lenght + Top_hLine_Start_X ; // X End line postion on screen from the left side
        int Top_hLine_End_Y = Top_hLine_Start_Y;
      
        int Bot_hLine_Start_X = Top_hLine_Start_X;
        int Bot_hLine_Start_Y = Top_hLine_Start_Y + Bar_height ;
        int Bot_hLine_End_X = Top_hLine_Start_X + Bar_lenght ; 
        int Bot_hLine_End_Y = Bar_height + Top_hLine_End_Y ;
                    
        int Start_Point = Top_hLine_Start_X;
        int End_Point = Top_hLine_Start_X + Bar_lenght;
        int But_Radius = 10; // size of the slider indicator 
      
        int mid_button = Top_hLine_Start_Y + ( Bar_height/2 );
        int bar_start_position = Top_hLine_Start_X + ( But_Radius ) ;
        int bar_end_position = Top_hLine_End_X - ( But_Radius ) ;
      
        ezProgressBar bl ("Keukenlamp dimmer", " brightness " , "left# #ok#up#right# ");
            while (true) {
                  String b = ez.buttons.poll();
      
                    //Draw lamp images and load them from sd root
                    M5.Lcd.drawJpgFile(SD, "/c50x50_light_icon_off.jpg",20, 75, 50, 50);
                    M5.Lcd.drawJpgFile(SD, "/c50x50_light_icon_on.jpg",255, 77, 50, 50);
      
                    // conversion to 0 -- 100 to set dimmer
                    int dimmer_value = (( bar_position / Bar_steps ) * 10 );
                    Serial.println( dimmer_value );        
                
                    // slider indicator draw
                    M5.Lcd.fillCircle((  bar_position ) , mid_button, But_Radius, 0xffff); // draw a white dot based on the _bar_y value
                    M5.Lcd.fillCircle(( bar_position - Bar_steps ), mid_button, But_Radius, 0x0000); // draw a blck dot based on the _bar_y value
                    M5.Lcd.fillCircle(( bar_position + Bar_steps ) , mid_button, But_Radius, 0x0000); // draw a blck dot based on the _bar_y value
                    
                    // Draw the rectangle for the slider
                    M5.Lcd.drawLine(Top_hLine_Start_X, Top_hLine_Start_Y, Top_hLine_End_X, Top_hLine_End_Y, 0xffff); //Draw a line from the point X0 and Y0 to the point X1 and Y1 with a color from 0 to 65535
                    //M5.Lcd.drawLine((Top_hLine_Start_X - 1), (Top_hLine_Start_Y  + 2), Top_hLine_End_X - 1 , Top_hLine_End_Y + 2 , 0x0ff0); //shade line 
                    M5.Lcd.drawLine(Bot_hLine_Start_X, Bot_hLine_Start_Y, Bot_hLine_End_X, Bot_hLine_End_Y, 0xffff); //Draw a second hor line and draw 2 vertical lines between them in the next two lines of code
                    M5.Lcd.drawLine(Top_hLine_Start_X, Top_hLine_Start_Y, Bot_hLine_Start_X, Bot_hLine_Start_Y, 0xffff); //Left vert drawn line based on top and bot line
                    M5.Lcd.drawLine(Top_hLine_End_X, Top_hLine_Start_Y, Bot_hLine_End_X, Bot_hLine_End_Y, 0xffff);//Right vert drawn line based on top and bot line


                    /////////////////// Steps right
                   if (b == "right" && bar_position <= Bar_lenght ){
                      ( bar_position += Bar_steps );
                      Serial.println ( bar_position );
                                    }
                    
                    ////////////////// Steps left
                    
                    if (b == "left" && bar_position > Bar_steps) {
                      bar_position -= ( Bar_steps );
                    Serial.println ( bar_position );
                                    }
                                
                    if (b == "on") {
                    bar_position = Bar_lenght + 25 ;
                    }
                    if (b == "off"){ bar_position = Top_hLine_Start_X  ;
                    }
                    if (b == "ok") break;  // Jump out of loop and goto part that posts values to mqtt
      
                    if (b == "up") loop();  // Jump out of loop and goto main menu 
      // Ok was pressed, and now we calculate the dimmer value, prepare the payload and send it
      dimmer_value = (( bar_position / Bar_steps ) * 10 ); 
      
        
      // Prepare a JSON payload string
        String payload = "";
        payload += "{";
        payload += "\"command\": \"switchlight\", \"idx\": 143, \"switchcmd\": \"Set Level\", \"level\":";
        payload += dimmer_value;
        payload += "}";
      
      
        // Send payload
        char attributes[100];
        payload.toCharArray( attributes, 100 );
        client.publish( "domoticz/in", attributes );
        Serial.println( attributes );
        menu_brightness_slider();// Loop and restart slider
      }


      Not as dynamic as i wished, but its a start and with some parameter adjustments the slider bar can be converted to any size and even one that looks like a on and off switch, with only 2 positions.
      Why not just draw a rectangle instead of 4 lines ? Well the lines could be replaced by bitmaps, so the slider button will run between bitmaps instead of over ( stacked bitmaps give me a kind of interlaced images and looks odd )

      in this example i convert the slider bar to a scale of 0 - 100 and post in to my domoticz setup thru mqtt ( json formated )
      The mqtt part of the code is missing, but thats nothing more than adding the library in the arduino ide and set the parameters.
      Next step will be separate the mqtt part and run that on a different core, so connection won't stall over time.

      posted in M5EZ
      R
      r_255
    • RE: M5ez 2.0: testers wanted...

      0_1540105015957_IMG_0135.jpg

      Well slowly i am getting somewhere

      posted in M5EZ
      R
      r_255
    • RE: M5ez 2.0: testers wanted...
      void menu_brightness_slider(){
        ezProgressBar bl ("Keukenlamp dimmer", "Set brightness", "left#off#ok#up#right#on");
                  while (true) {
                    
                    String b = ez.buttons.poll();
                    
                    if (b == "right" && brightness <= 90) brightness += 10;
                    if (!brightness) brightness = 100;
                    if (b == "left" && brightness > 11) brightness -= 10;
                    if (b == "left" && brightness < 11) brightness = 0.01;
                    bl.value((float)(brightness));
                    if (b == "ok") break;
                    if (b == "off")brightness = 0.01;
                    if (b == "on")brightness = 100;
                    if (b == "up") loop();
      }
       
      // Prepare a JSON payload string
        String payload = "";
        payload += "{";
        payload += "\"command\": \"switchlight\", \"idx\": 143, \"switchcmd\": \"Set Level\", \"level\":";
        payload += brightness;
        payload += "}";
      
        // Send payload
        char attributes[100];
        payload.toCharArray( attributes, 100 );
        client.publish( "domoticz/in", attributes );
        Serial.println( attributes );
        menu_brightness_slider();
      }
      

      This works ! :O)

      0_1539883795078_m5dimmer.jpg

      Now a long press set on or off or back to menu

      posted in M5EZ
      R
      r_255
    • RE: M5ez 2.0: testers wanted...

      Hey Rop,

      I agree, and what you see is just a image from my design program. To get a estimate on how it looks in total on the m5. In the working model i use your header and buttons.

      i did just adjust the dark theme a bit and in between my image shows.

      Just playing with your work and see where the limits are. So far my programming is what limits me.

      Stuck on how to get the _brigtness value into my mqtt.
      Tried almost everything i can think of, did look into other code
      did look how variables are used, but this syntax is over my head. This publishes _Brightness as text but not as value.
      So close and still far away... It frustrates me over the past 2 days now.

      client.publish("domoticz/in", "{"command": "switchlight", "idx": 143, "switchcmd": "Set Level", "level": _brightness; }");

      It's just the basic skills i am missing, but in general i can understand what is happening.

      I agree on usability like in rgbw, but left or right and next option will set the previous isnt that hard. Less pushes makes things more use able, thats something that is my experience.

      a double push to go a level up/cancel might be more easy to understand for end users of the interface. While a enter or a level down is a single push of the middle button.

      Again, thanks for all your hard work ! and i do hope that the community contributes a bit more as in sharing experiences and code. So we dont expect 3.0 but there is still hope for v2.99 ;o)

      cheers
      Robin

      posted in M5EZ
      R
      r_255
    • RE: M5ez 2.0: testers wanted...

      Happy with v2.0
      The slider works fine now !

      While looking into your code to find the brightness slider i realized you did a shit load of work in a short period ... Amazing!
      Big thank you!

      0_1539752015056_dimmer_00.jpg

      Also made one based on the image menu and let the slider jump in steps of 20 and simply change the image
      Still having a hard time with the programming, but slowly i am getting some where.

      posted in M5EZ
      R
      r_255
    • RE: M5ez 2.0: testers wanted...

      Everything you see is just work in progress and hand drawn in vectors( sunday morning frustrations ). Ill make a bundle with stuffbut sofar its just all in one screen and vector. Would be great to make it a community effort and make it into a demo file that is included with M5ez.

      Not sure about what the end point is, can we scale sliders. re position them.

      I did re use most of my old gfx for a ipad interface
      and that is downloadable here

      http://files.domoticaforum.eu/index.php?cam=/Graphics

      posted in M5EZ
      R
      r_255
    • RE: M5ez 2.0: testers wanted...

      0_1538901434940_M5ez_gfx.png
      0_1538903569611_M5ez_gfx_bw.png
      This is spinning in my head... next to this dual core thingy. I guess this is what you get when i get frustrated from programming... lol

      posted in M5EZ
      R
      r_255
    • RE: M5ez 2.0: testers wanted...

      Its all yours..... Adjustments is no problem, its all vector gfx.
      You can drop me a line at my hotmail.com account for the changes, just add my forum nick in front.

      Cheers

      posted in M5EZ
      R
      r_255
    • RE: M5ez 2.0: testers wanted...

      Hey Rop,

      Nice you are making progress!
      I would like to see if i can move the slider in a negative way, not sure if i am much of a help with my skills.
      But thats all up to you. Happy with all your efforts anyway.

      0_1538850576464_logo_m5ez_growing.png
      Meanwhile i spend some time on doing what is more familiar to me.

      Hi @ Moelski

      posted in M5EZ
      R
      r_255
    • RE: M5ez, a complete interface builder system for the M5Stack as an Arduino library. Extremely easy to use.

      @bobolink
      yeah, i did find the guy with the funny accent ;o) video including the skeleton file.. thanks for the link!

      I totaly agree! It might not be made with the intention to be remote controller, but it could be a nice one.

      Not sure about battery life, but there is still much to gain on that subject i guess. Screen brightness for instance will help a lot.

      I guess there are also a lot of things you could hook up on to the slider
      Like a dimmer, volume controller or even stuff like tv channels, Where a double press could be 10 up or 10 channels down. where a short press is just one.
      Or in a horizontal menu indicating where you are.

      Not sure if the ezslider bar could be re positioned or combined with a image, but i guess we will find a way.....
      Still wondering how i could do a rgb device in a easy way besides giving every color its own page.

      :O)

      posted in PROJECTS
      R
      r_255
    • RE: M5ez, a complete interface builder system for the M5Stack as an Arduino library. Extremely easy to use.

      Thanks bobolink, i will find some lessons about using the 2 cores of the esp32.
      Cheers!

      posted in PROJECTS
      R
      r_255
    • RE: M5ez, a complete interface builder system for the M5Stack as an Arduino library. Extremely easy to use.

      Thats good to know, so it could be that it isnt me... Learned a lot the past days! Thanks

      Still have some issues on loosing connection over time, but not sure if that is me or the m5stack. Am i the only one ?

      PS: backlight dimming would be nice on a ProgressBar, if it isnt to much work.

      posted in PROJECTS
      R
      r_255
    • RE: M5ez, a complete interface builder system for the M5Stack as an Arduino library. Extremely easy to use.

      Okay i can get some value in to pb now and raise it once with + 10 by pushing a button and then i stall.

      void add(){
            
            ezProgressBar pb ("Dimmer", "Dims te kitchen light", "LEFT#UP#RIGHT");
             pb.value(val);
        while (val <= 101 && val >= 1 ) {
              String btnpressed = ez.getButtons();
          if (btnpressed == "UP") loop(); 
          if (btnpressed == "LEFT") {
              pb.value(val - 10);}
          if (btnpressed == "RIGHT") {
              pb.value(val + 10);
              }
        }
      
      }
      

      but i am not giving in until i got this running.

      Any one that can give this noob some pointers ? It doesn't have to be a fixed solution but after some days of learning i am kind of blinded

      posted in PROJECTS
      R
      r_255
    • RE: M5ez, a complete interface builder system for the M5Stack as an Arduino library. Extremely easy to use.

      I am failing hard on the progressbar, is there any other pointer or example people could share.

      I have been reading for a few days, but i just dont get it.

      I am not sure about pb.value(float val)

      i want to add or distract 10 on a button push, but i am failing hard.

      
                if (btnpressed == "up")
                break;
            
                else (btnpressed == "left"); {
                pb = pb + 10; ;
                }
                
                if (btnpressed == "right"); {
                pb = pb + 10; 
                 }
      

      Would be nice to abuse the progressbar for things like volume or dimmer status and if any one has a pointer. thanks in advance.

      posted in PROJECTS
      R
      r_255
    • RE: M5ez, a complete interface builder system for the M5Stack as an Arduino library. Extremely easy to use.

      Hi Rop,

      I finaly found some time and as non programmer i did manage to use your code and make it talk mqtt just copy and pasted some code from you and the pubsub lib and it does work.

      Below the code i used to control my domoticz setup thru mqtt :

      I had to make some adjustment to PubSubClient.h and made some values higher like socket timeout, max packet size and degraded version.
      So i guess it isnt that hard after all. To make sure you understand that i am a compete noob and dont even know what language i have been copy and pasting.

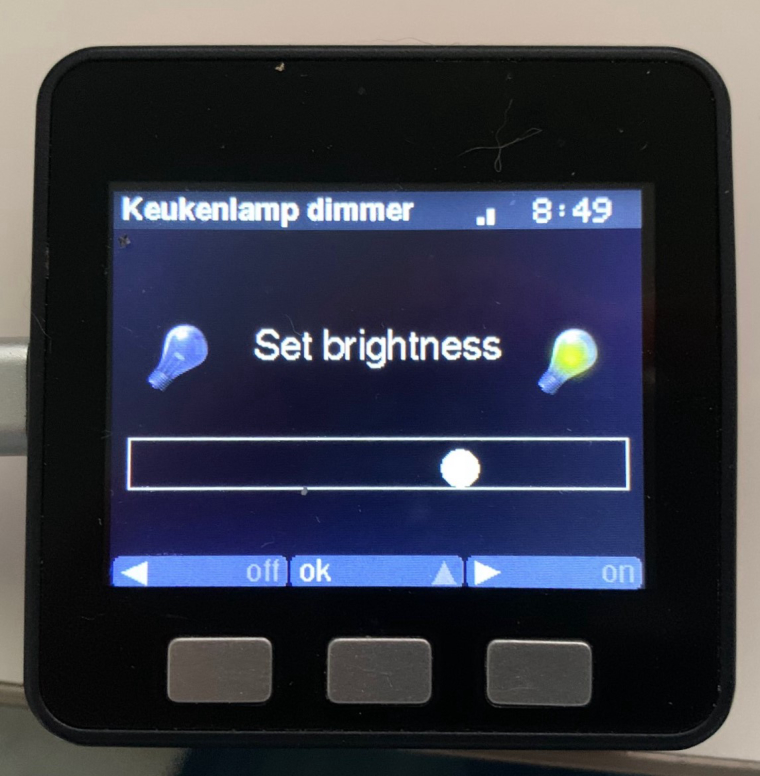
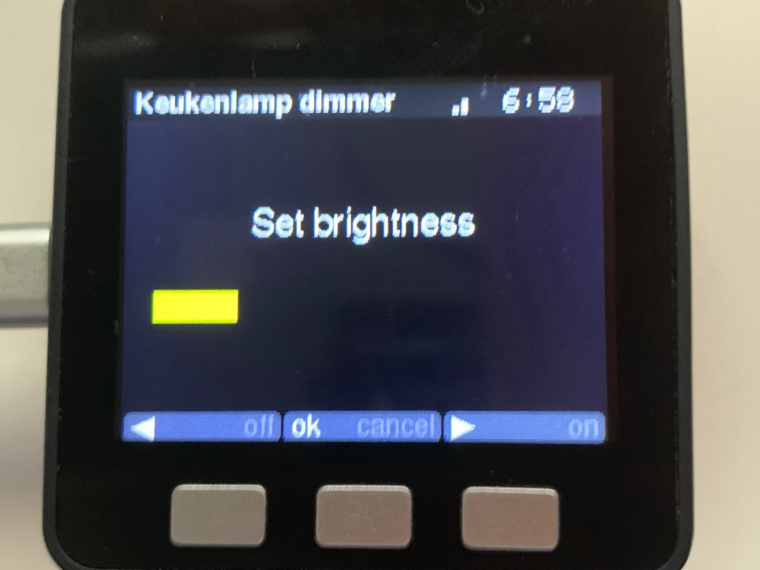
      Next try will be to use the ezProgressBar and let that drive the dimmer based on pb.value. But that will be a real challenge for me as copy and paste coder.

      adjustment to PubSubClient.h:

      #define MQTT_SOCKET_TIMEOUT 60
      #define MQTT_MAX_PACKET_SIZE 1024
      #define MQTT_VERSION_3_1 3

      Now the code below runs fine sofar ( 15 mins or so )


      #include <M5Stack.h>
      #include <M5ez.h>
      #include <WiFi.h>
      #include <PubSubClient.h>
      
      
      const char* ssid = "xxxxxx";
      const char* password = "xxxxxxxxxxx";
      const char* mqttServer = "xxxxxxxxxxxxxx";
      const int mqttPort = 1883;
      const char* mqttUser = "xxxxxxxxxxxxxxxxt";
      const char* mqttPassword = "xxxxxxxxxxxxxx";
      
      WiFiClient esp32Client;
      PubSubClient client(esp32Client);
      long lastMsg = 0;
      char msg[50];
      int value = 0;
      
      void setup() {
      Serial.begin(115200);
      WiFi.begin(ssid, password);
       
      while (WiFi.status() != WL_CONNECTED) {
          delay(500);
          Serial.println("Connecting to WiFi..");
      }
       
      Serial.println("Connected to the WiFi network");
      client.setServer(mqttServer, mqttPort);
       
        while (!client.connected()) {
          Serial.println("Connecting to MQTT...");
       
          if (client.connect("esp32Client", mqttUser, mqttPassword )) {
       
            Serial.println("connected");
       
          } else {
       
            Serial.print("failed with state ");
            Serial.print(client.state());
            delay(2000);
       
          }
        }
        m5.begin(); 
      }
      
      void loop() {
        ezMenu myMenu("Main menu");
        myMenu.addItem("lamp bank aan", mainmenu_one); 
        myMenu.addItem("lampbank uit", mainmenu_two);
        myMenu.addItem("dimmer keukenlamp", mainmenu_three);
        myMenu.run();     
      }
      
      void mainmenu_one() {
        client.publish("domoticz/in", "{\"command\": \"switchlight\", \"idx\": 136, \"switchcmd\": \"On\", \"level\": 100}");
        Serial.println("mqtt send");
      }
      
      void mainmenu_two() {
        client.publish("domoticz/in", "{\"command\": \"switchlight\", \"idx\": 136, \"switchcmd\": \"Off\", \"level\": 0}");
        Serial.println("mqtt off send");
        }
      
      void mainmenu_three() {
        ezMenu subMenu("Submenu");
        subMenu.addItem("Keuken off", submenu_off);
        subMenu.addItem("Dim 10%", submenu_one);
        subMenu.addItem("Dim 20% ", submenu_two);
        subMenu.addItem("Dim 30%", submenu_three);
        subMenu.addItem("Dim 40%", submenu_four);
        subMenu.addItem("Dim 50%", submenu_five);
        subMenu.addItem("Dim 60%", submenu_six);
        subMenu.addItem("Dim 70%", submenu_seven);
        subMenu.addItem("Dim 80%", submenu_eight);
        subMenu.addItem("Dim 90%", submenu_nine);
        subMenu.addItem("Dim 100%", submenu_ten);
        subMenu.addItem("Back | Back to main menu");
        subMenu.upOnFirst("last|up");
        subMenu.downOnLast("first|down");
        subMenu.run();
        client.loop();
      }
      
      void submenu_one() {
        client.publish("domoticz/in", "{\"command\": \"switchlight\", \"idx\": 143, \"switchcmd\": \"Set Level\", \"level\": 10}");
        Serial.println("mqtt send");
      }
      
      void submenu_two() {
        client.publish("domoticz/in", "{\"command\": \"switchlight\", \"idx\": 143, \"switchcmd\": \"Set Level\", \"level\": 20}");
        Serial.println("mqtt send");
      }
      
      void submenu_three() {
        client.publish("domoticz/in", "{\"command\": \"switchlight\", \"idx\": 143, \"switchcmd\": \"Set Level\", \"level\": 30}");
        Serial.println("mqtt send");
      }
      
      void submenu_four() {
        client.publish("domoticz/in", "{\"command\": \"switchlight\", \"idx\": 143, \"switchcmd\": \"Set Level\", \"level\": 40}");
        Serial.println("mqtt send");
      }
      
      void submenu_five() {
        client.publish("domoticz/in", "{\"command\": \"switchlight\", \"idx\": 143, \"switchcmd\": \"Set Level\", \"level\": 50}");
        Serial.println("mqtt send");
      }
      void submenu_six() {
        client.publish("domoticz/in", "{\"command\": \"switchlight\", \"idx\": 143, \"switchcmd\": \"Set Level\", \"level\": 60}");
        Serial.println("mqtt send");
      }
      
      void submenu_seven() {
        client.publish("domoticz/in", "{\"command\": \"switchlight\", \"idx\": 143, \"switchcmd\": \"Set Level\", \"level\": 70}");
        Serial.println("mqtt send");
      }
      
      void submenu_eight() {
        client.publish("domoticz/in", "{\"command\": \"switchlight\", \"idx\": 143, \"switchcmd\": \"Set Level\", \"level\": 80}");
        Serial.println("mqtt send");
      }
      
      void submenu_nine() {
        client.publish("domoticz/in", "{\"command\": \"switchlight\", \"idx\": 143, \"switchcmd\": \"Set Level\", \"level\": 90}");
        Serial.println("mqtt send");
      }
      
      void submenu_ten() {
        client.publish("domoticz/in", "{\"command\": \"switchlight\", \"idx\": 143, \"switchcmd\": \"Set Level\", \"level\": 100}");
        Serial.println("mqtt send");
      }
      
      void submenu_off() {
        client.publish("domoticz/in", "{\"command\": \"switchlight\", \"idx\": 143, \"switchcmd\": \"Off\", \"level\": 0}");
        Serial.println("mqtt send");
      }```
      posted in PROJECTS
      R
      r_255