Blynk on M5Stack via uiFlow and block-maker
-
Try the following:
edit the crontab
pi@raspberrypi:~ $ crontab -e
no crontab for pi - using an empty oneSelect an editor. To change later, run 'select-editor'.
- /bin/ed
- /bin/nano <---- easiest
- /usr/bin/vim.tiny
Choose 1-3 [2]: 2
Go to the end of the file and add the following command. Do not forget to modify the path to match your installation directory.@reboot java -jar /home/pi/server-0.23.0.jar -dataFolder /home/pi/Blynk &
-
That’s the one I followed and still not auto loading. Will have another go tonight
-
@world101 Got everything working using UiFlow V1.2!
-
Hi! I'm a complete beginner learning to use stickC, I managed to figure out Blynk with Arduino, but now, I'd like to do it with uiflow.
Since I have the latest versions of both (blynk.py - 0.2.6 & uiflow - 1.4.5.1), I wanted to know if the procedure is still the same. Also, if there are other reference links/good material to learn about esp32 with python, then do share!
I'm an industrial design student trying to make a battery-powered heated lunchbox for my thesis, which I'd like to control with the phone and also show nice graphics using stickC.
Any help appreciated!
Thank you :) -
@akshaypatil said in Blynk on M5Stack via uiFlow and block-maker:
Hi! I'm a complete beginner learning to use stickC, I managed to figure out Blynk with Arduino, but now, I'd like to do it with uiflow.
Since I have the latest versions of both (blynk.py - 0.2.6 & uiflow - 1.4.5.1), I wanted to know if the procedure is still the same. Also, if there are other reference links/good material to learn about esp32 with python, then do share!
I'm an industrial design student trying to make a battery-powered heated lunchbox for my thesis, which I'd like to control with the phone and also show nice graphics using stickC.
Any help appreciated!
Thank you :)Alright!
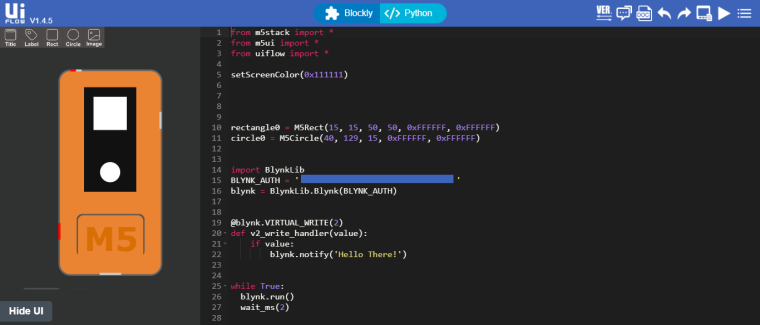
I figured how to upload and run the BlynkLib 0.2.0 on uiflow - 1.4.5. :D
The device is successfully detected and shown running on the android app.
Now, I only need to figure how to control/toggle GPIO pins through uiflow with Blynk. :)Any tips? :P
P.S.
The push notification is not working. Is this limited to M5Stack only? Or also possible on my device...
-
I haven’t worked with Blynk in a while, so I can’t comment on gpio control. If you end up getting something working, please share it.
I’ll see if I can find time to test push notifications on the m5stickC.
-
This post is deleted! -
@world101 Sure will!

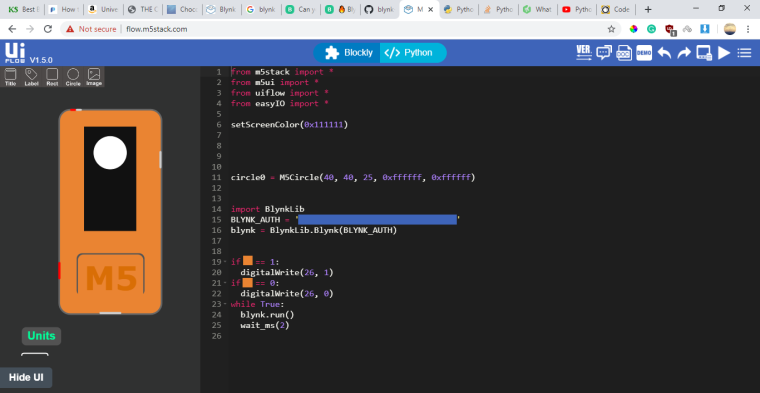
I was thinking if it was possible to insert the received virtual value from Blynk button here (orange block), one could toggle the GPIO pin.
P.S. The push notifications work perfectly! Didn't add the notification widget. (silly me!)
Now I just need to figure out to toggle GPIO through virtual values from the button.
-
Done! :D
from m5ui import * from uiflow import * from easyIO import * setScreenColor(0x111111) circle0 = M5Circle(40, 40, 25, 0xffffff, 0xffffff) import BlynkLib BLYNK_AUTH = 'Your Authentication KEY ' blynk = BlynkLib.Blynk(BLYNK_AUTH) @blynk.VIRTUAL_WRITE(4) # Button Widget on V4 def my_write_handler(value): toggleIO(26) while True: blynk.run() wait_ms(2) -
Here are the blocks for uiflow,
http://s000.tinyupload.com/index.php?file_id=08084396321658982238and don't forget to use it together with the one uploaded by @world101 (https://www.dropbox.com/s/xosetw0qzin722l/Blynk.m5b?dl=0)
Cheers! :)