Building Core2 FactoryDemo in PlatformIO
-
If anyone else is trying to do this you'll need to fix your partition table to take advantage of the larger memory. The steps how to do this are:
- Go to PIO Home in Visual Studio Code
- Click on
+New Project - Name it m5core2 or similar. Choose
M5Stack Core ESP32for the board. - Leave Framework set to Arduino.
- Open your platformio.ini file and replace the text with this:
[env:m5stack-core-esp32] platform = espressif32 board = m5stack-core-esp32 framework = arduino ; [[[for macos]]] ;upload_port = /dev/cu.SLAB_USBtoUART ; [[[fix PSRAM size and you won't need have this file]]] board_build.partitions = default_16MB.csv build_flags = -DBOARD_HAS_PSRAM -mfix-esp32-psram-cache-issue- Copy the 16MB partition table file into your src directory. You can download this file here:
https://github.com/espressif/arduino-esp32/blob/master/tools/partitions/default_16MB.csv
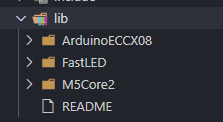
- In the 'lib' directory you will need three libraries.
FastLED - https://github.com/FastLED/FastLED
M5Core2 - https://github.com/m5stack/M5Core2
ArduinoECCX08 - This one is in a zip file in the M5Core2 library repo:
https://github.com/m5stack/M5Core2/blob/master/examples/core2_for_aws/ArduinoECCX08.zip
Your lib directory should look like this when you're done:

- Now copy everything from the example FactoryTest directory in the M5Core2 library into your
srcfolder. The directory files can be viewed here:
https://github.com/m5stack/M5Core2/tree/master/examples/core2_for_aws/FactoryTest
-
Rename FactoryTest.ino to main.cpp
-
Edit main.cpp and comment out these two lines with
//. These tests will fail if you don't have an SDCard or something plugged into the IO port.

-
Connect your M5Core2 and build/upload. You can do CTRL-Shift-P to find the Platformio:Upload option.
-
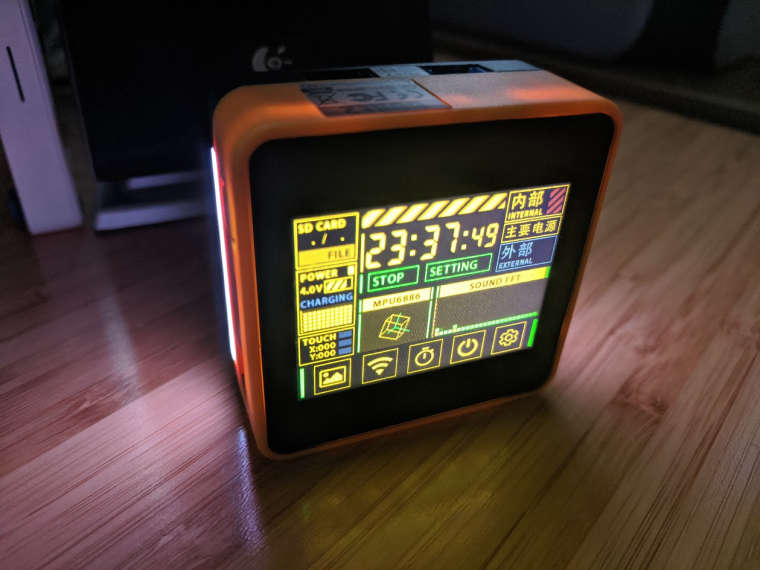
Play with the cool factory demo!

Thanks to jokercatz for the tip on fixing the platform:
http://jokercatz.blogspot.com/2020/11/m5stack-core2-build-from-platformio.html -
Great post! thank you for sharing your with us your knowledge, will be pretty useful for many users over here.
-
Could i build and upload every example ( in my case the Core2 AWS ) with platform IO or i need to use idf.py from ESP-IDF ?
When i use platform IO i already have the ESP-IDF install i suppose.In all cases i need it to edit the configuration with the command "idf.py menuconfig" (right?), example in this step https://edukit.workshop.aws/en/blinky-hello-world/connecting-to-aws.html#configuring-the-esp32-firmware
-
There are modifications that need to be done to use all the examples with PlatformIO. Currently we are requiring the use of ESP-IDF v4.2 and at the moment PlatformIO only supports 4.1. You could modify the projects and they should work:
- Rename the "main" directory to "src"
- Possibly update cmakelists.txt files (depends on example)
-
Hi @greenleaf Are you using the M5GO Battery Bottom2? Tried following your step-by-step and it is just stuck at AT608A Check failed.
Mine is core2 without the battery bottom.
Thanks,
smua -
This is specifically for the Core2 for AWS IoT EduKit hardware. The regular Core2 and/or the standard M5Go bottom will not work with this firmware.
-
@greenleaf said in Building Core2 FactoryDemo in PlatformIO:
http://jokercatz.blogspot.com/2020/11/m5stack-core2-build-from-platformio.html
Thanks for the guidance.
How could this be adjusted for the M5AtomLite, M5Stack Basic and M5Paper ? -
@rashedtalukder Actually if you comment out the code checking for AT608A chip it works on plain Core 2
-
I found the actual Factory Test code for the Core 2 as this example is for the AWS Core 2
https://github.com/m5stack/M5-ProductExampleCodes/tree/master/Core/M5Core2/Arduino -
There are pin differences for some of the features, but yes you can disable the atecc608 part of the code.
-
Thanks, I needed this so much!
-
bool Device = 1; // Please select your device
// Core2 = 1,Core2_AWS = 0;I Chaged from 0 to 1