Lesson 21.1. UNITS. LIGHT
-
The purpose of this lesson
Hi! Today we will get acquainted with the light units and learn to determine the presence of light (figure 1).
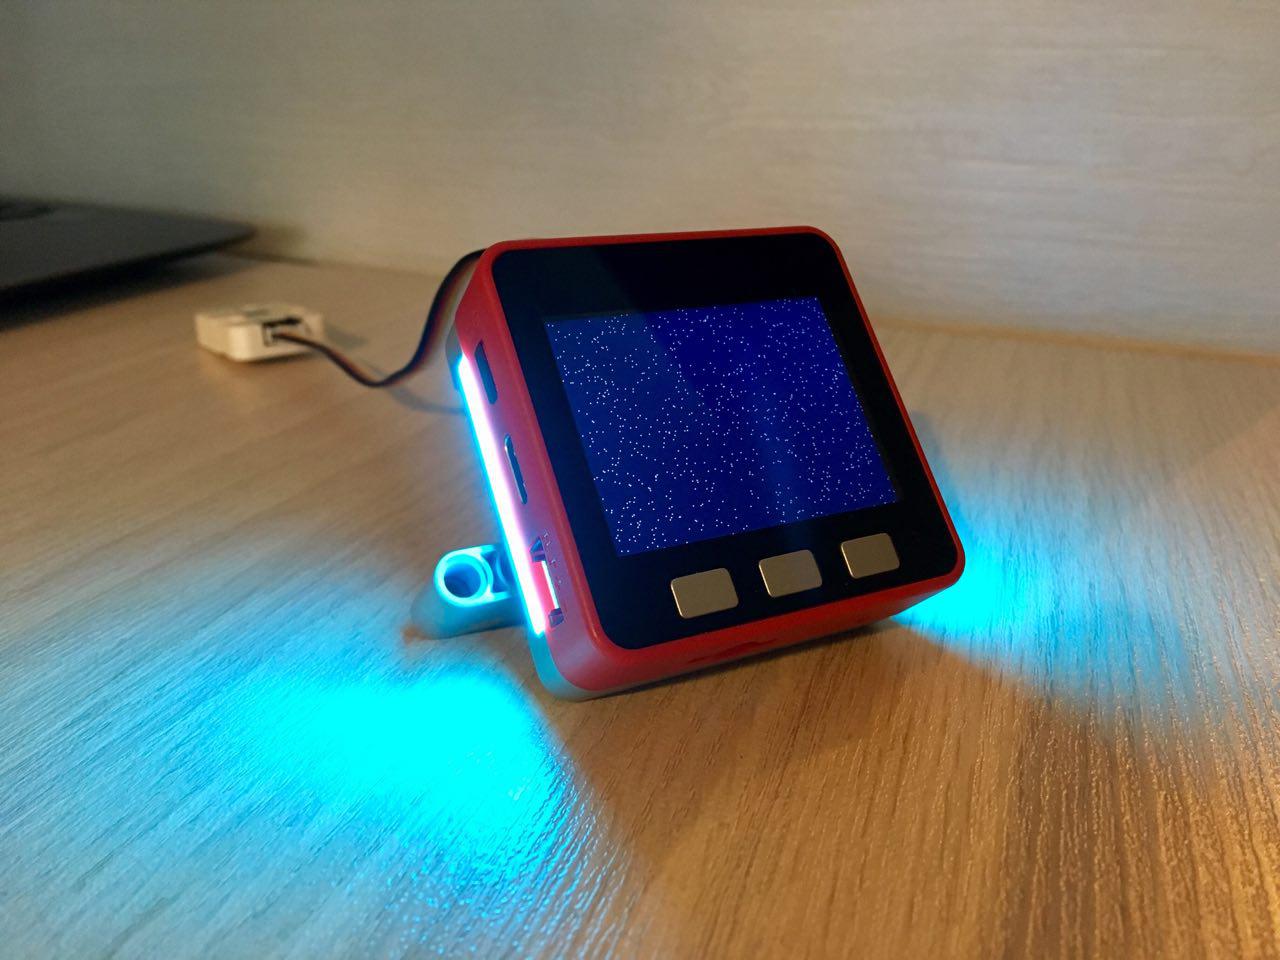
Figure 1
This lesson will teach you how to obtain and process digital data about the presence of a light source.
Short help
- Purpose: used to determine the presence of a light source
- Scope: agriculture, science and home life
- Connection interface: I /O (b port slot connector)
Supply voltage: 5 V - Compatibility: M5 fire
- Form factor: LEGO compatible
Brief overview
Light is one of a large family of additional modules (blocks) designed primarily for M5 fire. This module Comes in a plastic box. The kit includes an excellent cable (15 cm) with installed groove plugs (figure 2). On the front side of the sensor there is a sticker with the name of the module and the designation of contacts. Interestingly, the sensor can operate in two modes: analog and digital.
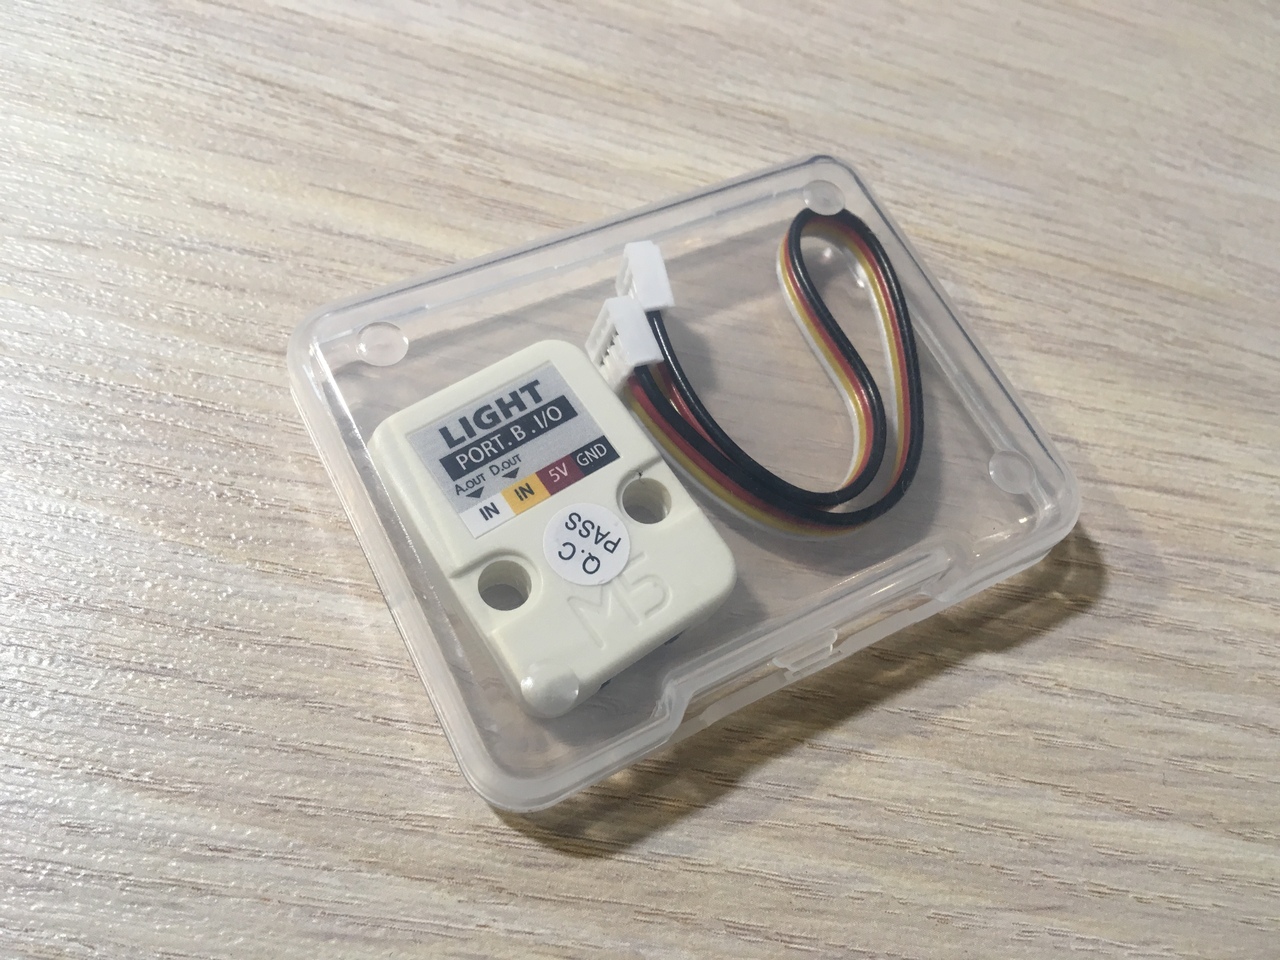
Figure 2
In order to set the trigger threshold for the digital output, there is a trimmer resistor motor on the back of the sensor (figure 3), which can be rotated with a screwdriver.
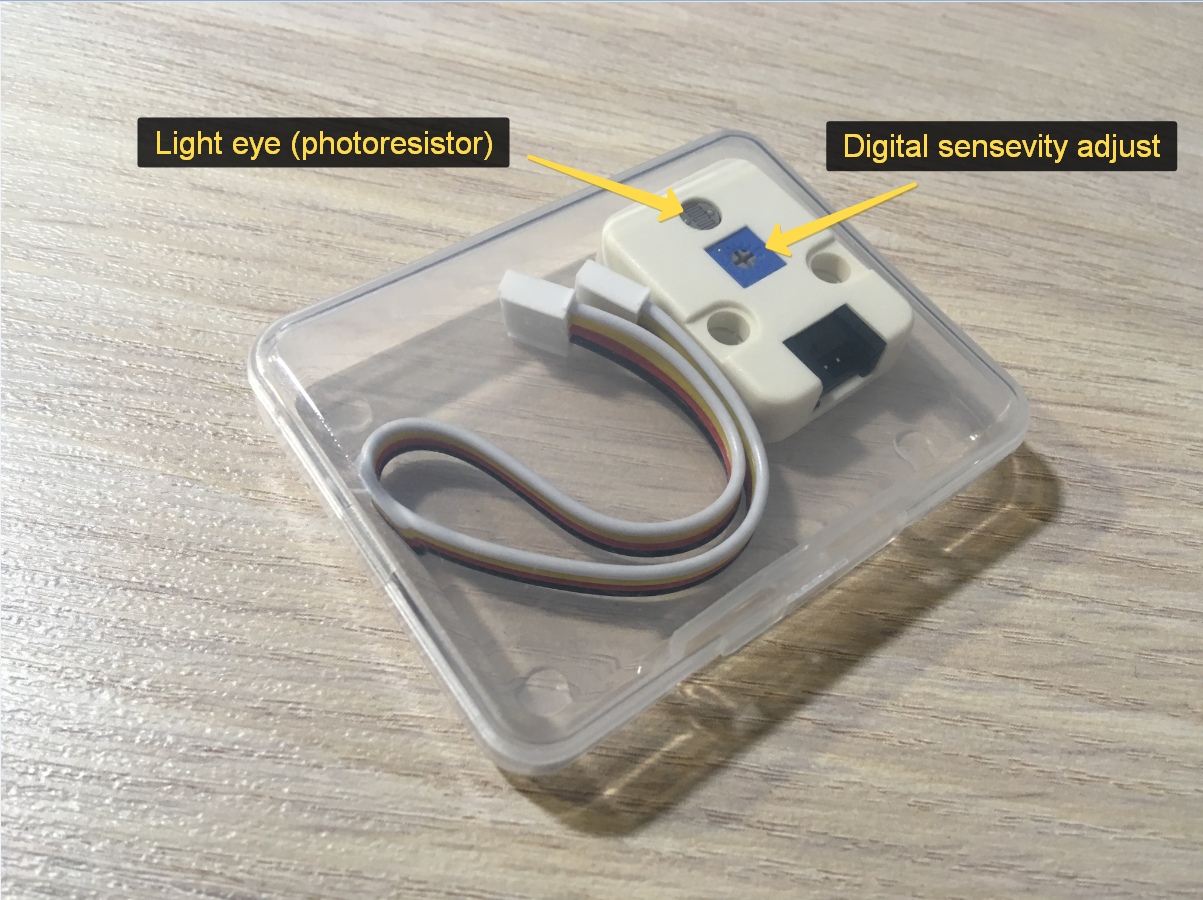
Figure 3
Overall dimensions of the sensor are ridiculous, and the problems with installation is not (figure 4) :)
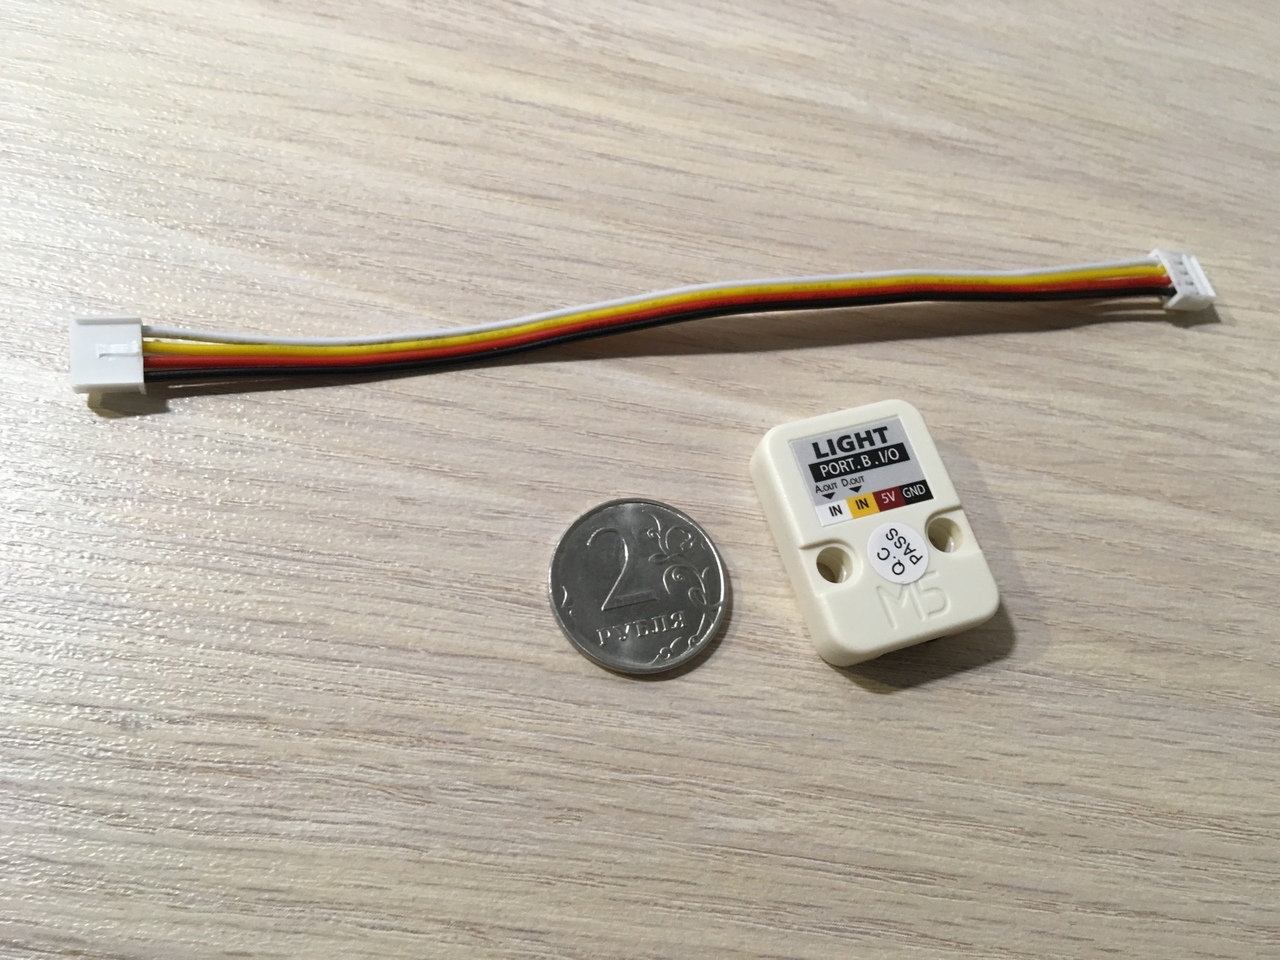
Figure 4
The sensor Is connected directly to the above M5 port using the supplied cable. The light should fall into the hole with the sensor (figure 5).

Figure 5
Let's start!
Blockly (UI Flow)
First of all, we need to make sure that the UI thread is connected to the M5. If You see the words "Disconneted", then repeatedly press the arrows (1) as long as the label (2) not to be changed to "connected". Great! Blocks Can now be added by clicking on the plus (3) (figure 6).
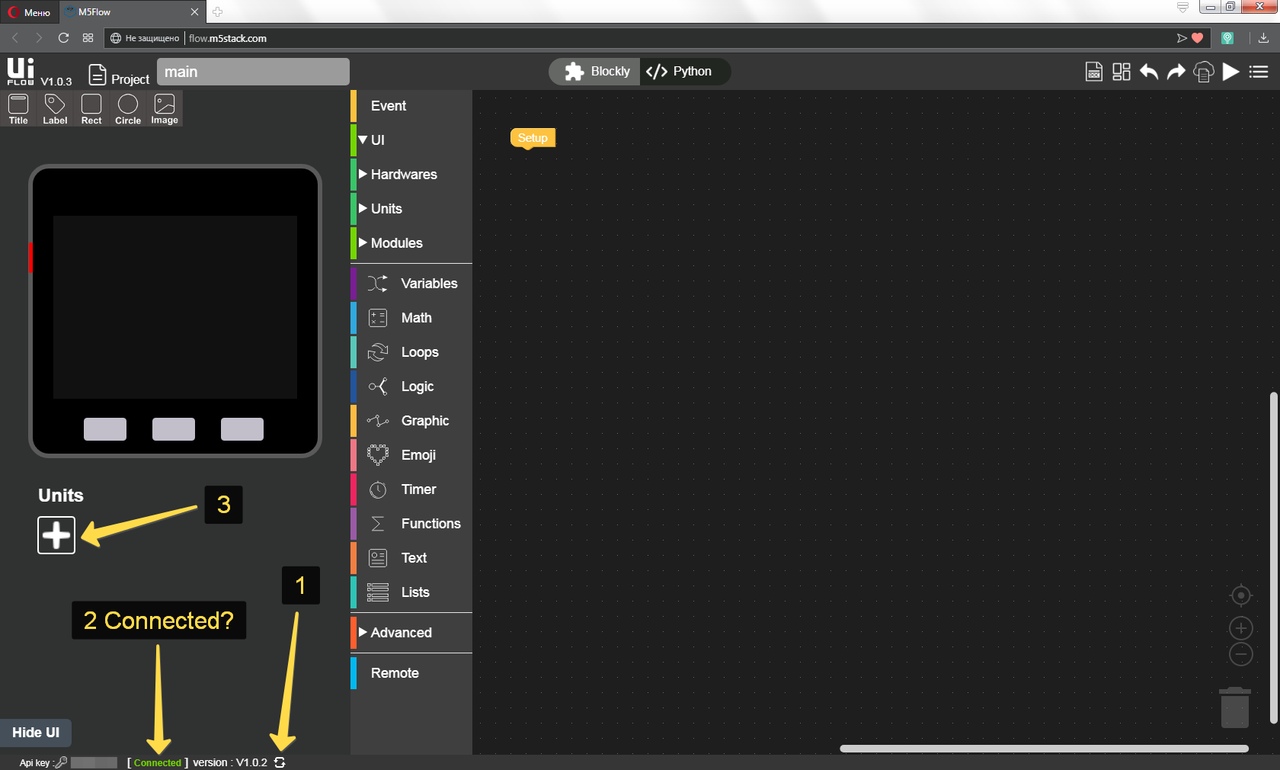
Figure 6
OK, now check the box next to the light (1), then click OK (2) (figure 6.1).
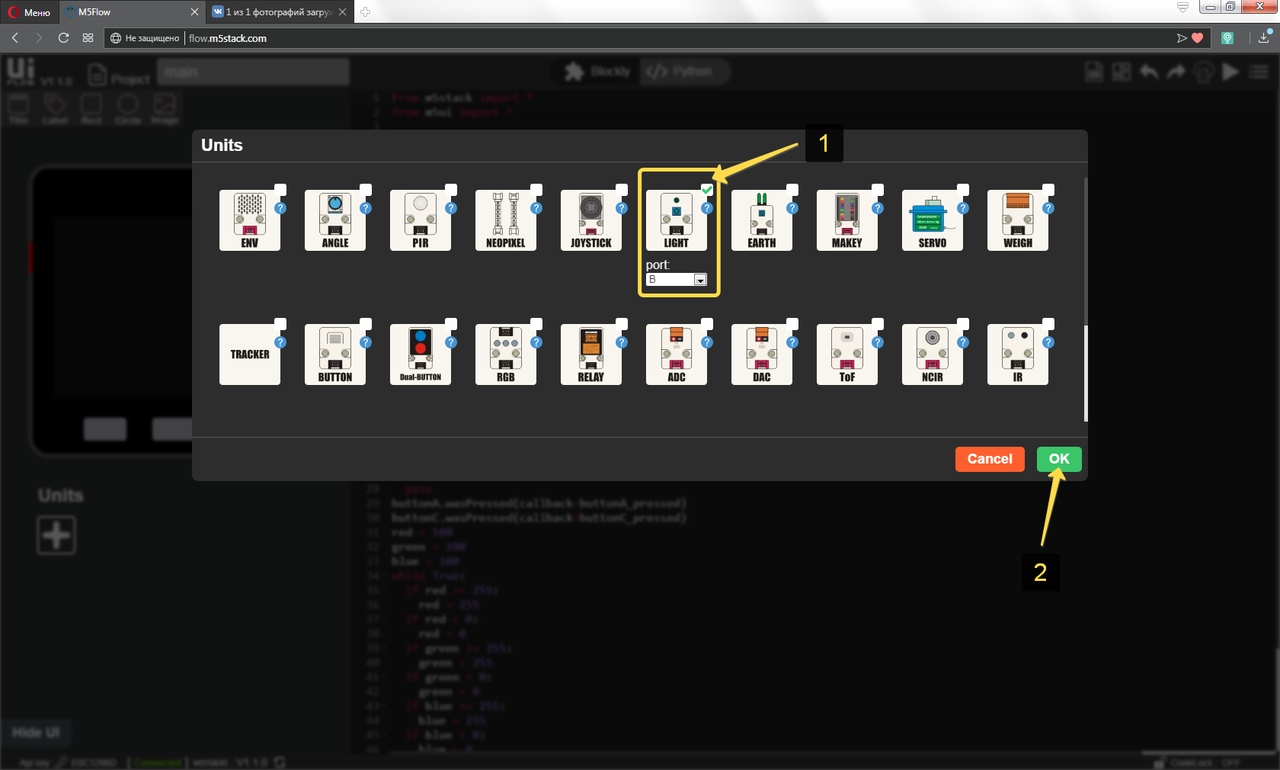
Figure 6.1
In order to get the digital data from the module you need to add the appropriate puzzle Blockly. Units press (1), then light (2), then transfer the digital value (3) to the puzzle workspace (figure 6.2).
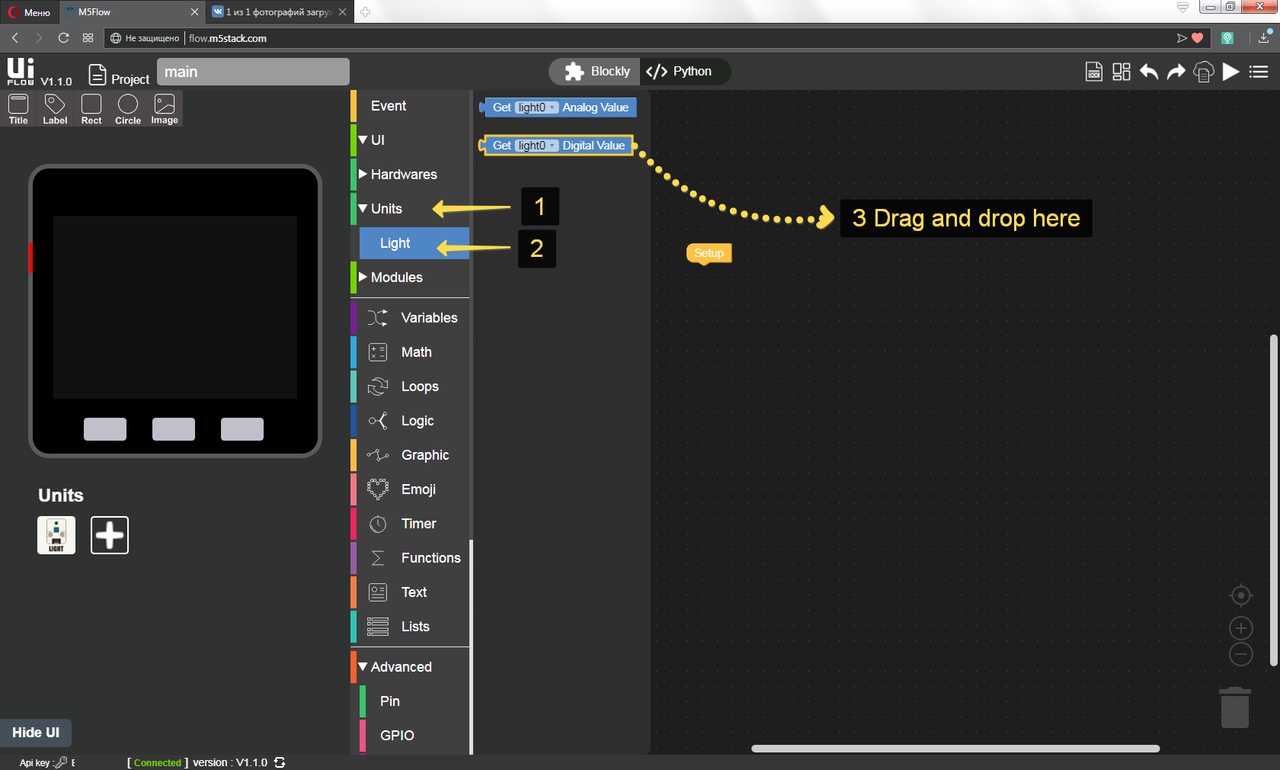
Figure 6.2
When the light falls on the sensor, it returns the logical unit on the digital output, in this case - we do not need the backlight and we turn it off, otherwise, on the contrary, we light the backlight. In order to control the heat of the glow, use the a key (colder) and the C key (warmer) (figure 7).
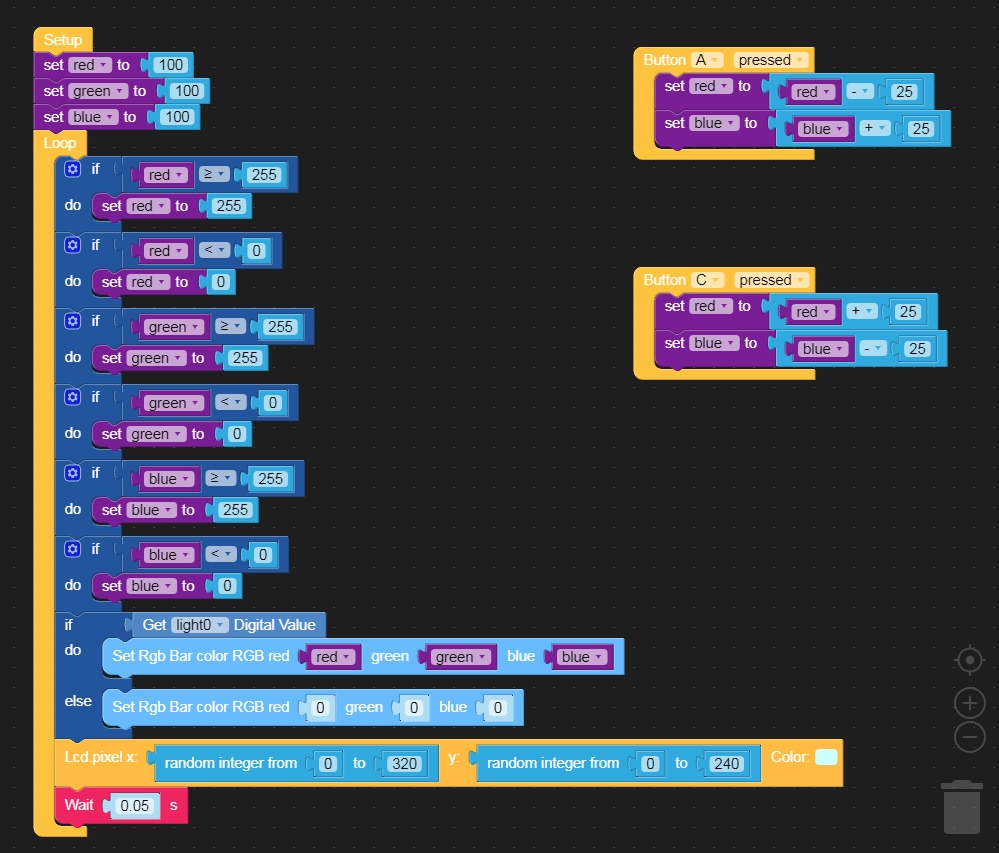
Figure 7
The lesson is finished! :)
MicroPython (UI Flow)
from m5stack import *
from m5ui import *
import units

clear_bg(0x000000)
light0 = units.Light(units.PORTB)


btnA = M5Button(name="ButtonA", text="ButtonA", visibility=False)
btnB = M5Button(name="ButtonB", text="ButtonB", visibility=False)
btnC = M5Button(name="ButtonC", text="ButtonC", visibility=False)

import random

red = None
blue = None
green = None


def buttonA_pressed():
  global red, blue, green, rgb, light0
  red = red - 25
  blue = blue + 25
  pass
def buttonC_pressed():
  global red, blue, green, rgb, light0
  red = red + 25
  blue = blue - 25
  pass
buttonA.wasPressed(callback=buttonA_pressed)
buttonC.wasPressed(callback=buttonC_pressed)
red = 100
green = 100
blue = 100
while True:
  if red >= 255:
    red = 255
  if red < 0:
    red = 0
  if green >= 255:
    green = 255
  if green < 0:
    green = 0
  if blue >= 255:
    blue = 255
  if blue < 0:
    blue = 0
  if light0.d_read():
    rgb.set_all(int('0x%02x%02x%02x' % (round(min(100, max(0, red)) * 2.55), round(min(100, max(0, green)) * 2.55), round(min(100, max(0, blue)) * 2.55))))
  else:
    rgb.set_all(0x000000)
  lcd.pixel(random.randint(0, 320), random.randint(0, 240), 0xccffff)
  wait(0.05)
  wait(0.001)
C & C++ (Arduino IDE)
Example not yet written ^_^
Downloads
Demo
-
Thank you
-
@dimi I've tried this and it works, but it makes so much noise. Each time it makes a reading (several times every second I guess) it makes an annoying "click" :\
-
@lastcaress You can to increase a delay interval.
Hello! It looks like you're interested in this conversation, but you don't have an account yet.
Getting fed up of having to scroll through the same posts each visit? When you register for an account, you'll always come back to exactly where you were before, and choose to be notified of new replies (either via email, or push notification). You'll also be able to save bookmarks and upvote posts to show your appreciation to other community members.
With your input, this post could be even better 💗
Register Login