Lesson 7. MPU9250. Game "SPACE DEFENSE" (beta)
-
The purpose of this lesson
Hi! Today we will learn how to work with the built-in sensor MPU9250 in silver model M5STACK.
The MPU9250 sensor includes a gyroscope, accelerometer and compass. In this lesson, we'll write a game "SPACE DEFENSE" (Fig. 1) Controlling the ship will be possible only by means of an inclination device. On the x-axis - the movement of the ship, and on the Y - axis-the opening of fire. Gyroscope and compass study by yourself.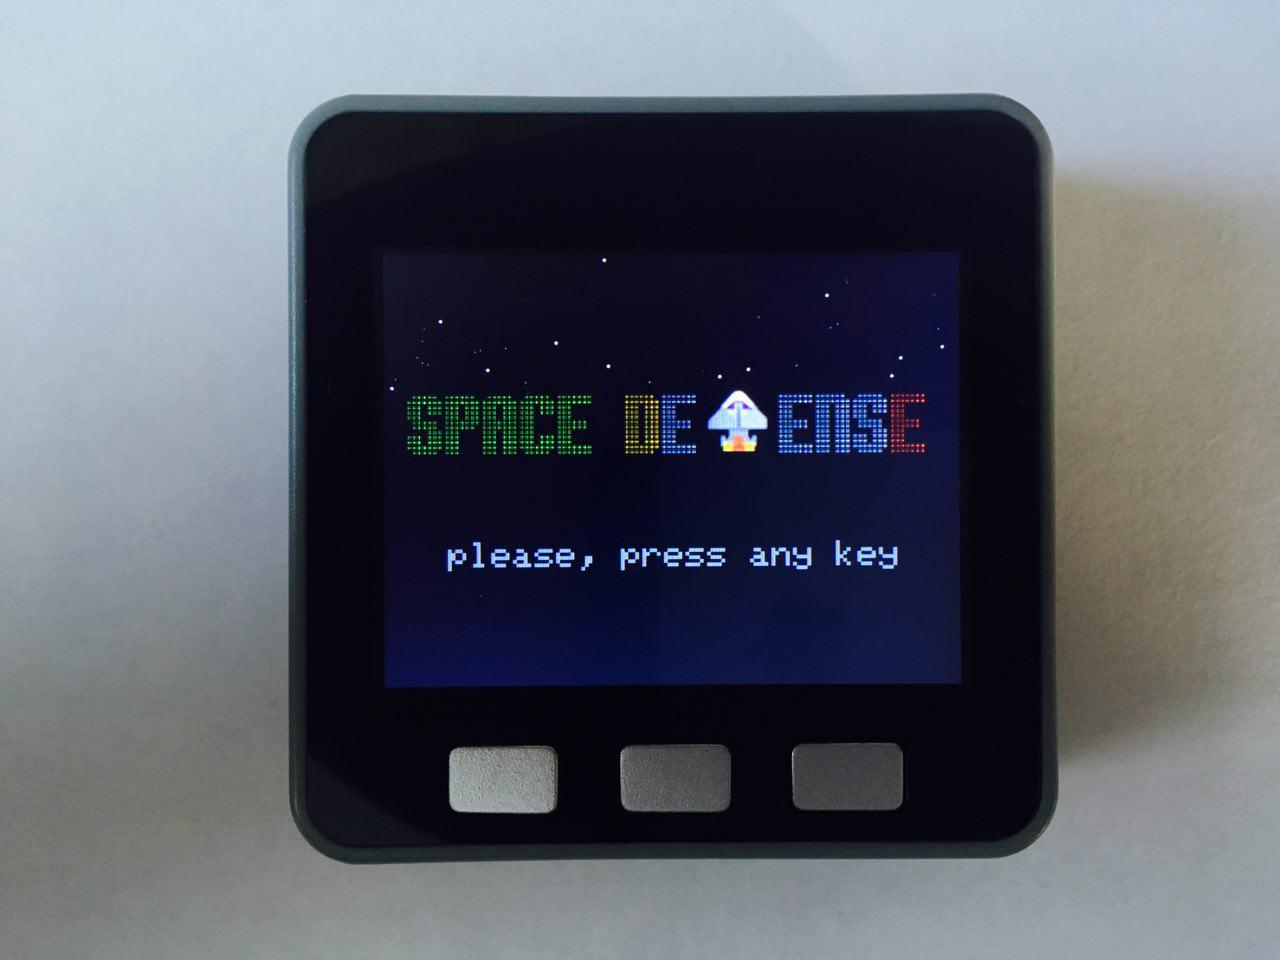
Figure 1. The start screen of the game
Brief theory
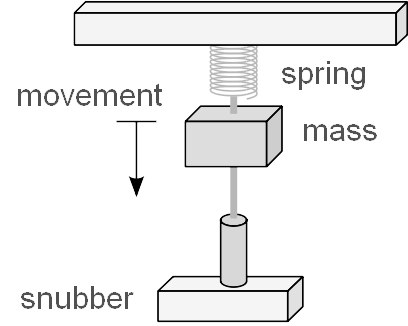
Figure 2. The device has a mechanical accelerometer
What is an accelerometer? Accelerometer – a device (Fig. 2), measuring the projection of the apparent acceleration (the difference between the true acceleration of the object and the gravitational acceleration). As a rule, the accelerometer is a sensitive mass fixed in an elastic suspension. Deviation of the mass from its initial position in the presence of apparent acceleration carries information about the magnitude of this acceleration.
More information on the Wiki: https://en.wikipedia.org/wiki/Accelerometer
List of components for the lesson
- M5stack silver model with built-in MPU9250.
Begin!
Step 1. Draw pictures
Draw a spaceship, a ship explosion and the logo of the game. Use any graphics editor convenient for you. We will use as usual the Paint (Fig. 3 – 3.2).

Figure 3. Draw a space ship

Figure 3.1. Draw the logo of the game
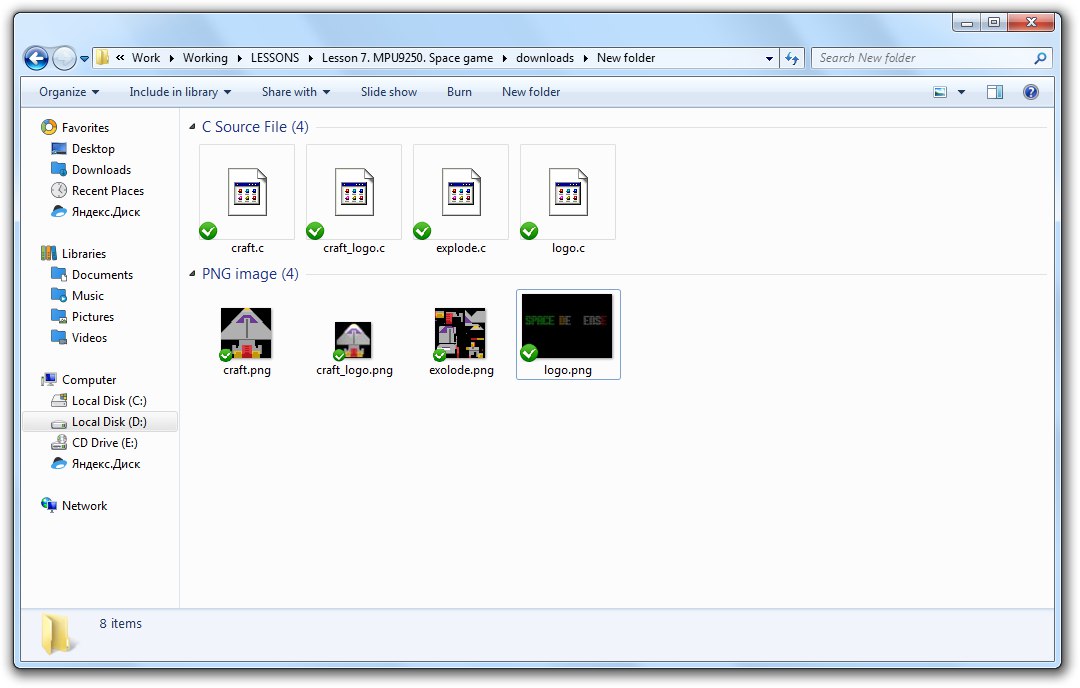
Figure 3.2. Collection of drawings for the project
In the future, we will connect the images to our new project:
extern unsigned char craft[];
extern unsigned char craft_logo[];
extern unsigned char explode[];
extern unsigned char logo[];
Step 2. Bullets and space debris
Consider the example of bullets. Let's make a bulletsObject structure that includes the coordinates of the size and state of the bullet (if the bullet is in flight, then busy = true).
struct bulletsObject
{
	int x;
	int y;
	int width = 3;
	int height = 6;
	bool busy;
};
Now let's do buffer, containing information about three bullets:
const int bullets_max = 3;
bulletsObject bulletsObjectArray[bullets_max];
Space debris (if hidden = true, the object is neutralized):
struct spaceDebrisObject
{
  int x;
  int y;
  int width = 15;
  int height = 15;
  bool hidden;
};
Let's make a buffer containing information about space debris:
const int spaceDebris_max = 100;
spaceDebrisObject spaceDebrisArray[spaceDebris_max];
Step 3. Let's move things that we have a lot
Multitasking? No – everything is easier. Do you remember - in one of the articles on the Arduino website it was told how to implement led flashing without delay function, which causes the microcontroller to stand idle? If you don't remember, then let's go to read https://www.arduino.cc/en/Tutorial/BlinkWithoutDelay.
We will do the same (Fig. 5). When the time comes, we will do the necessary actions and update the value of the previous millis time.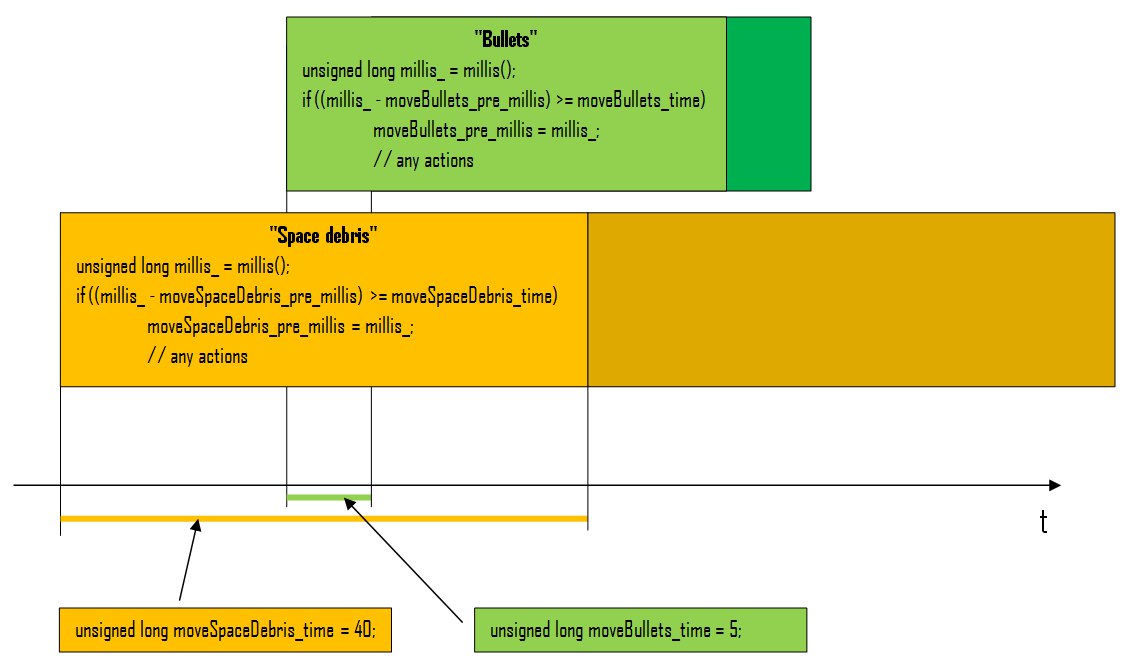
Figure 5.
Fire function is called from an infinite loop gameLoop() and takes as argument the integer value of the vector of the tilt axis Y. If the value of the vector is less than -250, then you will be fired. Let's talk about how to get values of slope vectors in the next step.
The movement takes place on The screen along the y axis of the entire array with graphical objects (Fig. 5.1).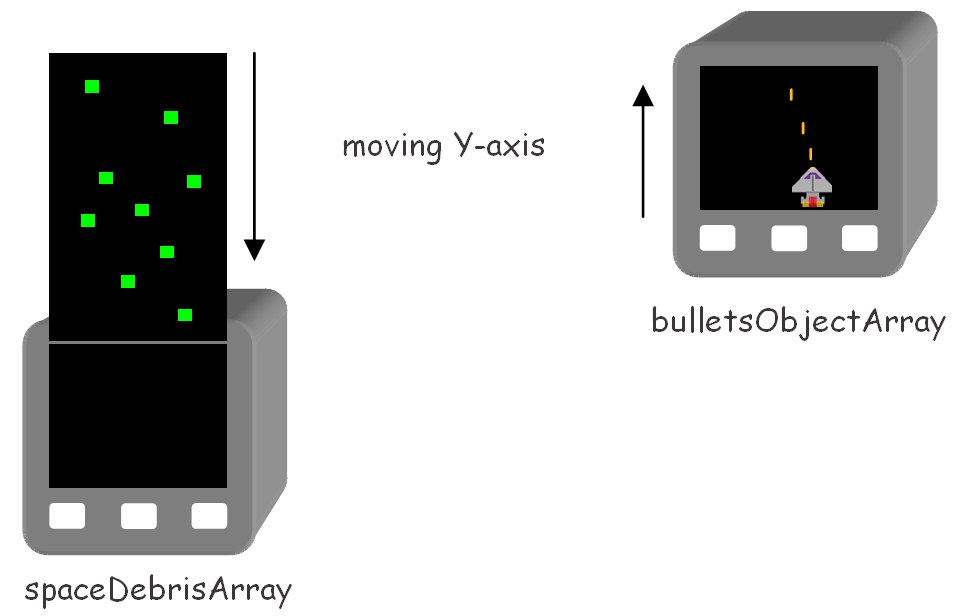
Figure 5.1. The principle of motion of graphic objects
void gameLoop() {
  while (true)
  {
    if (!moveCraft(getAccel('X'))) break;
    if (!moveSpaceDebris()) break;
    fire(getAccel('Y'));
    if (health < 0) break;
  }
  craftExplode();
}

void fire(int vector) {
  if (vector < -250)
  {
    if (!openFire)
    {
      for (int i = 0; i < bullets_max; i++)
      {
        if (!bulletsObjectArray[i].busy)
        {
          openFire = true;
          bulletsObjectArray[i].x = ((craft_x + (craft_width / 2)) - 1);
          bulletsObjectArray[i].y = craft_y;
          bulletsObjectArray[i].busy = true;
          break;
        }
      }
    }
  }
  else
  {
    openFire = false;
  }

  unsigned long millis_ = millis();
  if (((millis_ - moveBullets_pre_millis) >= moveBullets_time))
  {
    moveBullets_pre_millis = millis_;
    for (int i = 0; i < bullets_max; i++)
    {
      M5.Lcd.fillRect(bulletsObjectArray[i].x, bulletsObjectArray[i].y, bulletsObjectArray[i].width, bulletsObjectArray[i].height, 0x0000);
      if (bulletsObjectArray[i].busy)
      {
        bulletsObjectArray[i].y--;
        M5.Lcd.fillRect(bulletsObjectArray[i].x, bulletsObjectArray[i].y, bulletsObjectArray[i].width, bulletsObjectArray[i].height, 0xff80);
        if (bulletsObjectArray[i].y <= statusBar_height)
        {
          bulletsObjectArray[i].busy = false;
        }
        for (int j = 0; j < spaceDebris_max; j++)
        {
          if (((((spaceDebrisArray[j].x + spaceDebrisArray[j].width) >= bulletsObjectArray[i].x) && (spaceDebrisArray[j].x <= (bulletsObjectArray[i].x + bulletsObjectArray[i].width))) && ((spaceDebrisArray[j].y + spaceDebrisArray[j].height) >= (bulletsObjectArray[i].y + (bulletsObjectArray[i].height / 2))) && (spaceDebrisArray[j].y <= (bulletsObjectArray[i].y + bulletsObjectArray[i].height)) && (!spaceDebrisArray[j].hidden)))
          {
            bulletsObjectArray[i].busy = false;
            spaceDebrisArray[j].hidden = true;
            M5.Lcd.fillRect(bulletsObjectArray[i].x, bulletsObjectArray[i].y, bulletsObjectArray[i].width, bulletsObjectArray[i].height, 0x0000);
            M5.Lcd.fillRect(spaceDebrisArray[j].x, spaceDebrisArray[j].y, spaceDebrisArray[j].width, spaceDebrisArray[j].height, 0x0000);
            score++;
            drawHealthAndScore();
          }
        }
      }
    }
  }
}
If the bullet comes into contact with space debris, the game score increases by one, the state of the bullet takes the value busy = false, space debris becomes hidden hidden = true.
Step 4. Receiving data from the accelerometer
As was mentioned earlier, the accelerometer returns the values of the angles of deviation from the axes of the "tilt vectors" (Fig. 6).

Figure 6. The vectors of tilt of the accelerometer
First of all, you need to connect the library to work with MPU9250:
#include "utility/MPU9250.h"Declare an instance of the class:
MPU9250 IMU;Initialize and calibrate the sensor. Remember that MPU9250 is connected to ESP32 via I2C interface:
void setup(){
	M5.begin();
	Wire.begin();
  	IMU.initMPU9250();
  	IMU.calibrateMPU9250(IMU.gyroBias, IMU.accelBias);
	// any actions
}
Let's write a function that takes as an argument a symbol corresponding to one of the axes 'X', 'Y' or 'Z'. Function returns a vector of the tilt axis. If no data is received, the function returns 0:
int getAccel(char axis) {
  if (IMU.readByte(MPU9250_ADDRESS, INT_STATUS) & 0x01)
  {
    IMU.readAccelData(IMU.accelCount);
    IMU.getAres();
    switch(axis)
    {
      case 'X':
        IMU.ax = (float)IMU.accelCount[0] * IMU.aRes * 1000;
        return IMU.ax;
      case 'Y':
        IMU.ax = (float)IMU.accelCount[1] * IMU.aRes * 1000;
        return IMU.ax;
      case 'Z':
        IMU.az = (float)IMU.accelCount[2] * IMU.aRes * 1000;
        return IMU.az;
    }
  }
  return 0;
}
Step 5. Moving the spaceship
The function is overly simple, the principle of operation we considered in the previous step:
bool moveCraft(int vector) {
  unsigned long millis_ = millis();
  if (((millis_ - moveCraft_pre_millis) >= moveCraft_time))
  {
    moveCraft_pre_millis = millis_;
    int craft_x_pre = craft_x;

    if (abs(vector) > 70)
    {
      if (vector > 0)
        craft_x -= craft_step;
      else if (vector < 0)
        craft_x += craft_step;
      M5.Lcd.fillRect(craft_x_pre, craft_y, craft_width, craft_height, 0x0000);
    }

    if ((craft_x < (screen_width - craft_width - craft_step)) && (craft_x > craft_step))
    {
      M5.Lcd.drawBitmap(craft_x, craft_y, craft_width, craft_height, (uint16_t *)craft);
    }
    else
    {
      return false;
    }
  }
  return true;
}
Step 6. The game is over
void gameOver() {
  M5.Lcd.fillScreen(0x0000);
  M5.Lcd.setTextSize(2);
  M5.Lcd.setTextColor(0x7bef);
  M5.Lcd.setCursor(35, 80);
  M5.Lcd.print("GAME OVER");
  M5.Lcd.setCursor(35, 110);
  M5.Lcd.print("score: ");
  M5.Lcd.print(score);
  M5.Lcd.setCursor(35, 140);
  M5.Lcd.print("please, press any key");
  gameReset();
  while(true)
  {
    M5.update();
    if (M5.BtnA.wasPressed() || M5.BtnB.wasPressed() || M5.BtnC.wasPressed()) break;
  }
}
Step 7. Launch!
In General, it was a very interesting project dedicated to work with the accelerometer on Board MPU9250. Let's start and see how it works (Fig. 7, 7.1.):
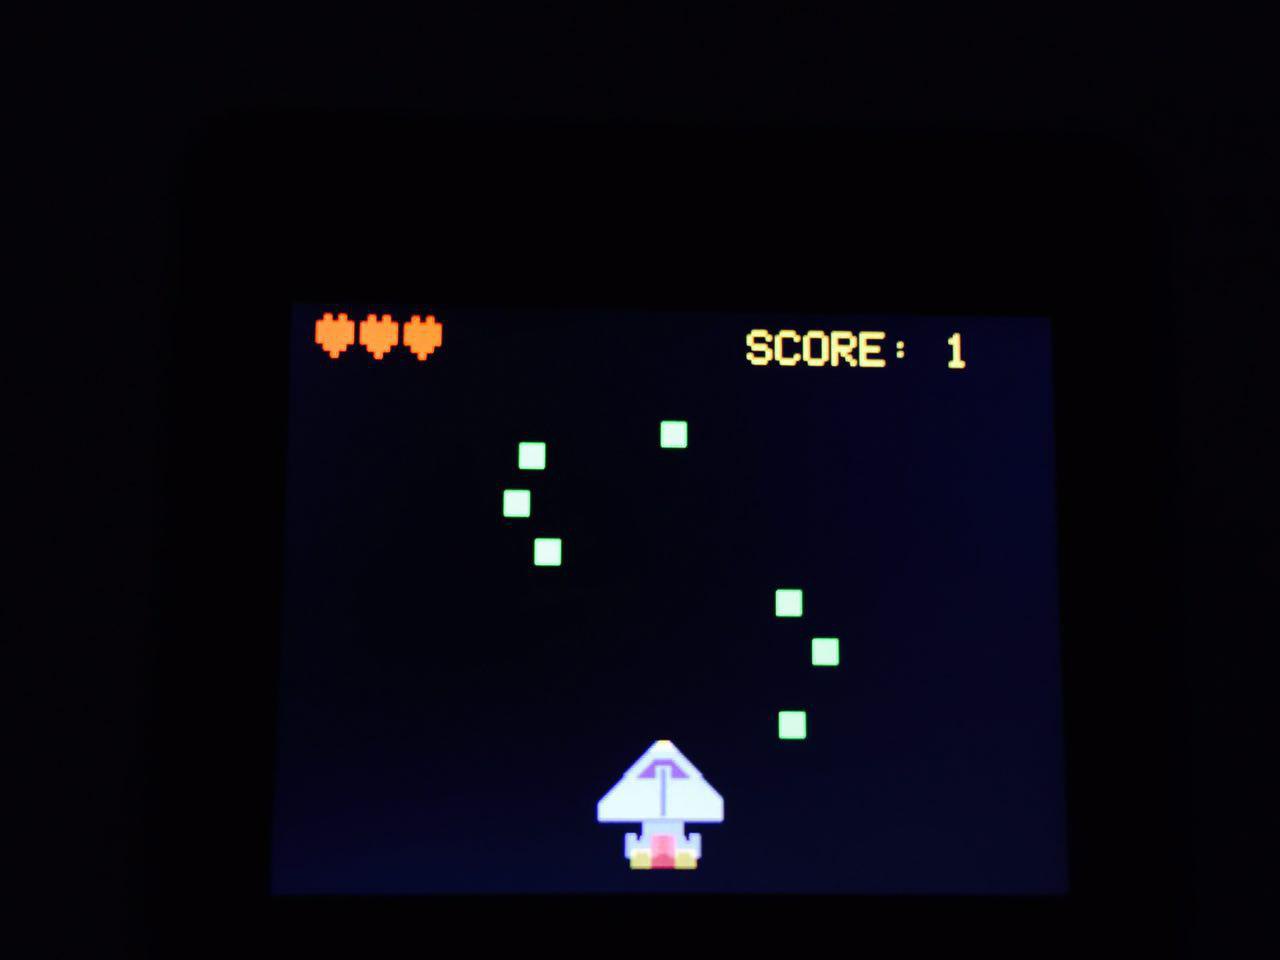
Figure 7. Gameplay
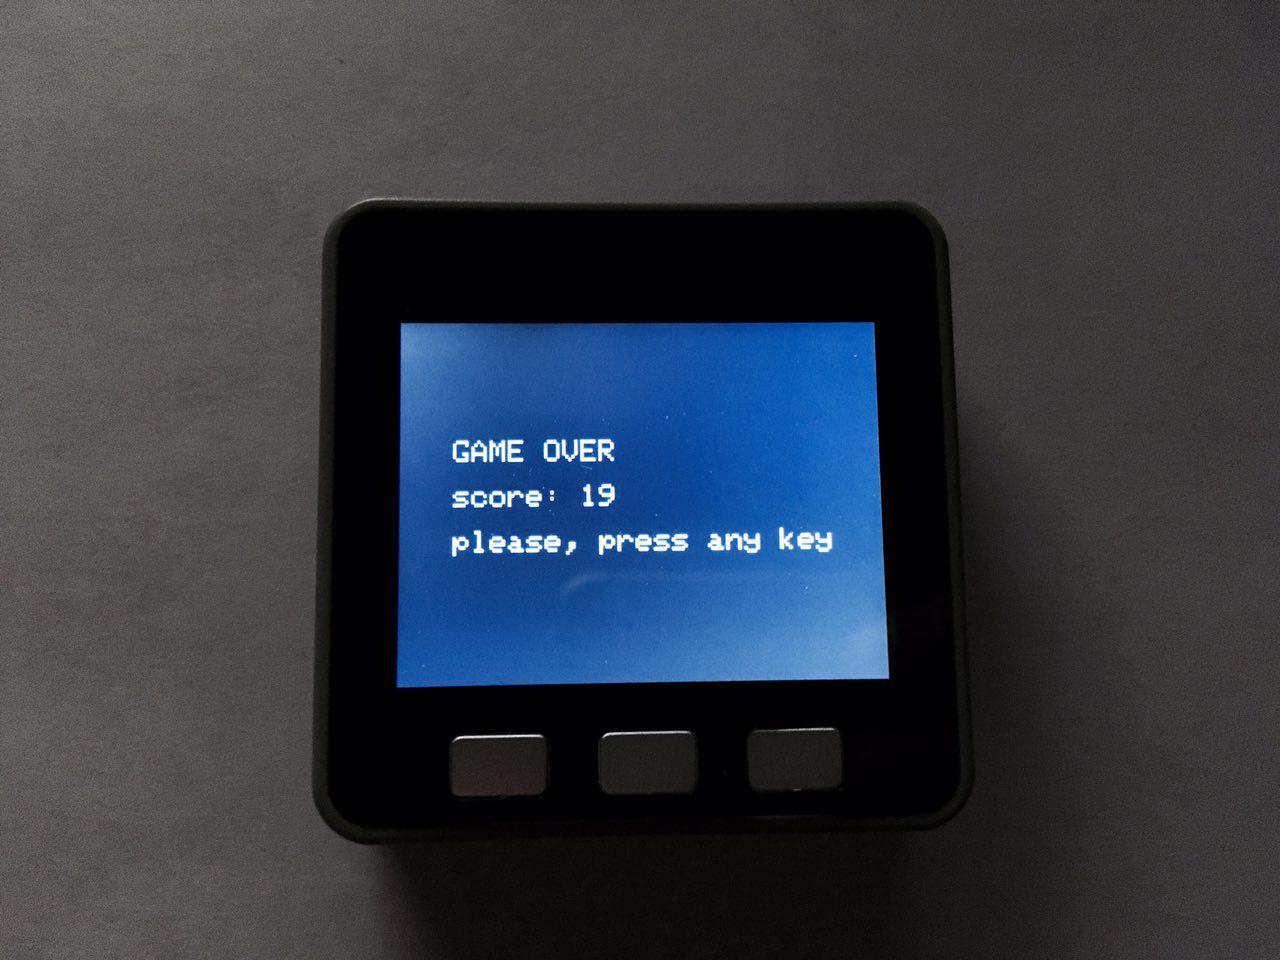
Figure. 7.1. The game is over
Download
-
Video demonstration of the work (YouTube): https://youtu.be/9gyiFfciUU4
-
Source code (GitHub): https://github.com/dsiberia9s/SpaceDefense-m5stack
-
Image converters (Yandex Disk):https://yadi.sk/d/m2zvebPf3T5Zrc
-
Images (Yandex Disk): https://yadi.sk/d/JMMyPHOq3T5Zmf
Hello! It looks like you're interested in this conversation, but you don't have an account yet.
Getting fed up of having to scroll through the same posts each visit? When you register for an account, you'll always come back to exactly where you were before, and choose to be notified of new replies (either via email, or push notification). You'll also be able to save bookmarks and upvote posts to show your appreciation to other community members.
With your input, this post could be even better 💗
Register Login